Your car struggles to start. The dashboard lights flicker. You pop the hood and see a strange crust on the battery posts. Many drivers ignore this buildup. They hope it will fade away. It never does. Many folks ask what cause car battery corrosion in the first place. You want a real answer. You want a solid fix. This guide covers the root problems. We will walk through a safe DIY cleaning method. You will learn how to stop it from returning. Safety comes first. Always wear gloves and eye protection when you work near car batteries. Let us fix this for good.
What Exactly Is Car Battery Corrosion?
The Chemistry Behind the Crust
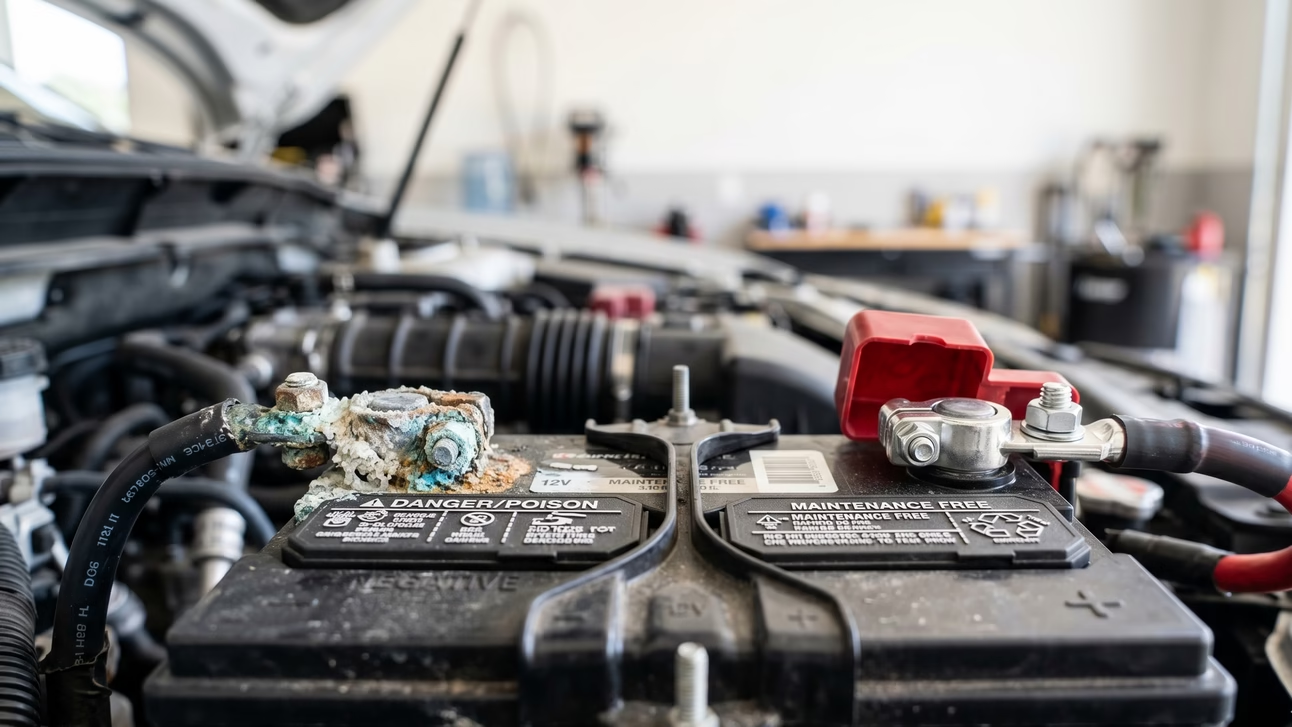
Your battery stores energy using liquid acid and metal plates. It releases small amounts of gas while it charges. That gas meets the metal posts. It mixes with oxygen and moisture in the air. The reaction creates a hard crust. The crust builds up over time. It blocks the flow of electricity. Your starter motor struggles. Your lights dim. The problem grows until the car will not turn over.
Color Guide: What Different Corrosion Types Mean
You might notice different shades on the posts. Car battery white powder is the most common sight. It forms from normal acid vapor and air. Green buildup points to copper sulfate. Loose connections often cause it. Black or gray marks signal deeper trouble. They hint at old age or internal wear. Color tells you a story. It shows you how fast you need to act.
Myth Busting: Just Dirt vs Reality
Some folks think you can just wipe it off with a rag. That idea misses the point. The crust eats into the metal. It creates a barrier. Wiping only moves the problem around. You must neutralize the acid. You must remove the buildup completely. You must seal the surface after. Short cuts lead to dead batteries.
The Real Causes of Car Battery Corrosion
Overcharging & Faulty Voltage Regulators
A healthy charging system delivers steady power. A broken system pushes too much voltage. Excess power forces the battery to vent more gas. The extra gas speeds up crust formation. A smart battery maintainer can catch this issue early. It keeps voltage stable. It stops the venting cycle before it starts.
Micro-Leaks & Compromised Battery Seals
Batteries age. The plastic case expands and shrinks with heat. Tiny cracks appear near the top. Acid vapor escapes through those gaps. It lands on the terminals. It reacts with the metal. A quick visual check catches most leaks. Replace any battery that shows swelling or wet spots.
Poor Terminal Connections & Cable Vibration
Loose bolts cause trouble. They let the cable wiggle while you drive. Friction scrapes off protective coatings. Fresh metal meets acid vapor. The reaction speeds up fast. Always tighten connections to a snug fit. Vibration kills clean connections. It turns a minor issue into a major mess.
Environmental Stressors
Weather plays a big role. Humid air feeds the reaction. Coastal salt spray accelerates metal decay. Road salt and winter chemicals stick to the case. Heat pushes the battery to work harder. Cold thickens the oil. Both extremes stress the system. Park in a garage when you can. Wash the engine bay area during harsh seasons.
Driving Habits
Short trips hurt your battery. The alternator needs time to top it off. Frequent stops drain power. Parasitic drain from alarms and radios adds up. The battery runs weak. Weak batteries vent more gas. Take longer drives when possible. Keep the charge full. A steady charge keeps the acid stable.
How to Diagnose Corrosion Before It Strands You
Visual & Physical Warning Signs
Look under the hood every few weeks. Check for white powder or green dust. Run your finger near the posts. Do not touch the crust directly. Feel for sticky residue or hard bumps. Check the plastic cover. Look for cracks or bulges. Catch it early. You save time and money.
Performance Red Flags
Listen to your car. A slow crank means trouble. The engine turns over like it is tired. Dashboard lights dim when you start. The radio resets after a drive. Power windows move slower. These signs point to poor electrical flow. The crust blocks the current. Do not wait for a dead battery.
Quick Health Check: Using a Multimeter
Grab a simple digital multimeter. It costs very little. Set it to DC volts. Touch the red probe to the positive post. Touch the black probe to the negative post. Read the screen. A healthy battery shows twelve point six volts or more. Lower readings mean a weak charge. Clean the posts. Test again. The numbers will rise if the crust was the issue.
Extended DIY Solution: How to Clean & Restore Corroded Terminals Safely
Step 0: Safety First
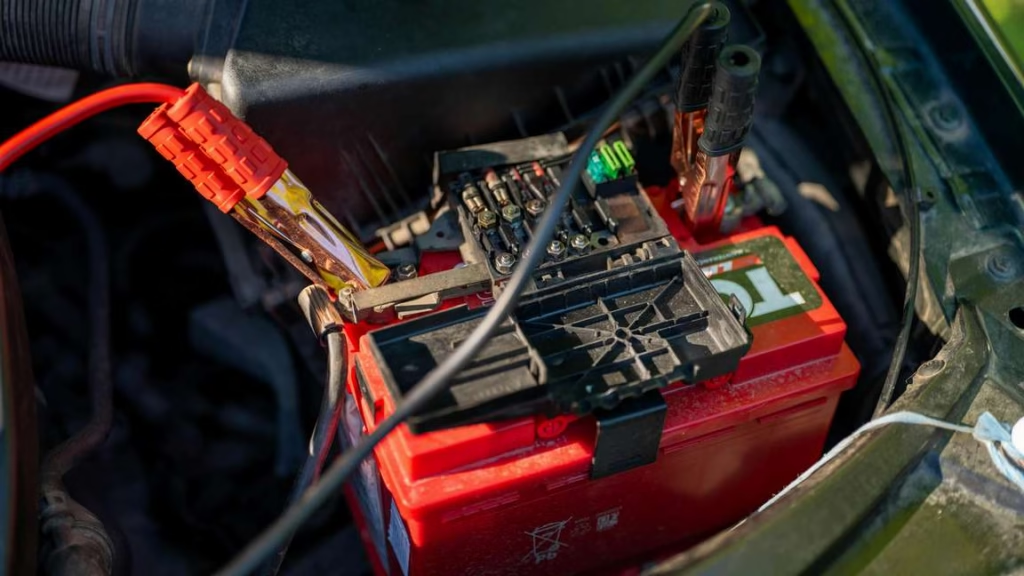
Work in a well ventilated space. Wear rubber gloves and safety glasses. Keep sparks away from the battery. Acid burns skin. It damages eyes. Never skip this step.
Step 1: Disconnect Properly
Always remove the negative cable first. Use a wrench to loosen the bolt. Pull the cable away. Tape the end so it does not touch metal. Remove the positive cable next. Keep them apart. Label them if you want extra peace of mind.
Step 2: Dry Debris Removal
Grab a stiff brush. Sweep away loose powder. Use a shop vacuum if you have one. Do not blow it with your breath. The dust irritates your lungs. Clear the area around the posts. Make room for the cleaning solution.
Step 3: Neutralize & Break Down Corrosion
Mix two tablespoons of baking soda with a cup of water. The paste will fizz when it hits acid. Apply it to the crust. Let it sit for a minute. The fizz means it is working. You can also use a dedicated terminal cleaner spray. Follow the label. Let the liquid do the heavy lifting.
Step 4: Deep Scrub & Detail
Grab a wire brush or a terminal cleaning tool. Scrub the posts until the metal shines bright. Scrub the inside of the cable clamps too. Rotate the tool. Apply steady pressure. Remove every patch of crust. Clean metal conducts power well. Dirty metal causes resistance.
Step 5: Rinse, Dry, & Inspect for Pitting/Cable Damage
Pour a small amount of clean water over the area. Wipe it dry with a paper towel. Check the posts for deep grooves. Look at the cable wires for fraying. Severe pitting means you need new cables. Surface wear just needs protection. Dry everything completely. Moisture ruins fresh connections.
Step 6: Reconnect & Seal
Attach the positive cable first. Tighten the bolt until it sits firm. Attach the negative cable next. Tighten it the same way. Do not overtighten. You will crack the post. Spray a light coat of anti corrosion spray over both terminals. You can also place felt washers under the clamps. These steps keep moisture away. They extend the life of the connection.
How to Prevent Car Battery Corrosion Long-Term
Terminal Protectors: Dielectric Grease vs Anti-Corrosion Pads
Dielectric grease creates a moisture barrier. It sits on the outside. It does not stop conductivity. Anti corrosion pads soak up acid vapor. They sit right under the clamps. Both methods work well. Pick one that fits your routine. Apply it after every clean. It stops the crust from forming again.
Charging Best Practices
Avoid cheap trickle chargers. They overcharge over time. Choose a smart charger instead. It reads the battery state. It adjusts power automatically. It stops when the battery hits full. Smart chargers keep voltage steady. They reduce gas venting. They protect your posts for years.
Inspection Cadence
Check your battery every month. Wipe down the case. Look for fresh powder. Clean it quickly if you spot any. Drivers in humid or coastal areas should clean it every sixty days. Drivers in dry climates can stretch to ninety days. Set a reminder on your phone. Use a simple task tracker app. Consistent checks beat emergency repairs.
When Replacement Beats Cleaning
Cleaning fixes connections. It does not fix a dying cell. Replace the battery if it is older than four years. Replace it if the case bulges. Replace it if fluid leaks inside the tray. Do not waste time on a cracked unit. A fresh battery solves the root problem. It stops the cycle of poor starts and crust buildup.
Frequently Asked Questions
Is car battery corrosion dangerous to touch or breathe?
Yes, it can irritate your skin and lungs. Always wear gloves and a mask when you handle it. Wash your hands right after you finish.
Can I use vinegar or soda to clean battery terminals?
Vinegar works as a mild acid cleaner. Soda works as a base neutralizer. Pick one method and stick to it. Do not mix them in the same session. Baking soda remains the safest choice for most drivers.
How often should I clean my car battery?
Check it monthly. Clean it fully every three to four months. Shorten the gap if you live near the coast or drive in heavy winter conditions.
Does cleaning corrosion void my battery warranty?
No, regular maintenance keeps your warranty valid. Manufacturers expect basic care. Keep receipts if you buy replacement parts. Follow safety steps to avoid damage.
Will anti corrosion spray interfere with electrical conductivity?
No, it sits on the outside of the connection. It seals out moisture and air. The metal inside stays clean. Electricity flows through the tight metal contact. The spray only blocks the path of rust and crust.
Conclusion
Crust on your battery posts signals a deeper issue. It shows acid vapor meeting metal. It shows loose connections or weak charging habits. You now know the real causes. You have a safe cleaning method. You know how to stop it from returning. Treat your battery with care. Clean the posts before they block your starter. Set a reminder for your next check. Grab a simple cleaning kit today. Keep your car starting strong every single morning. Your future self will thank you.