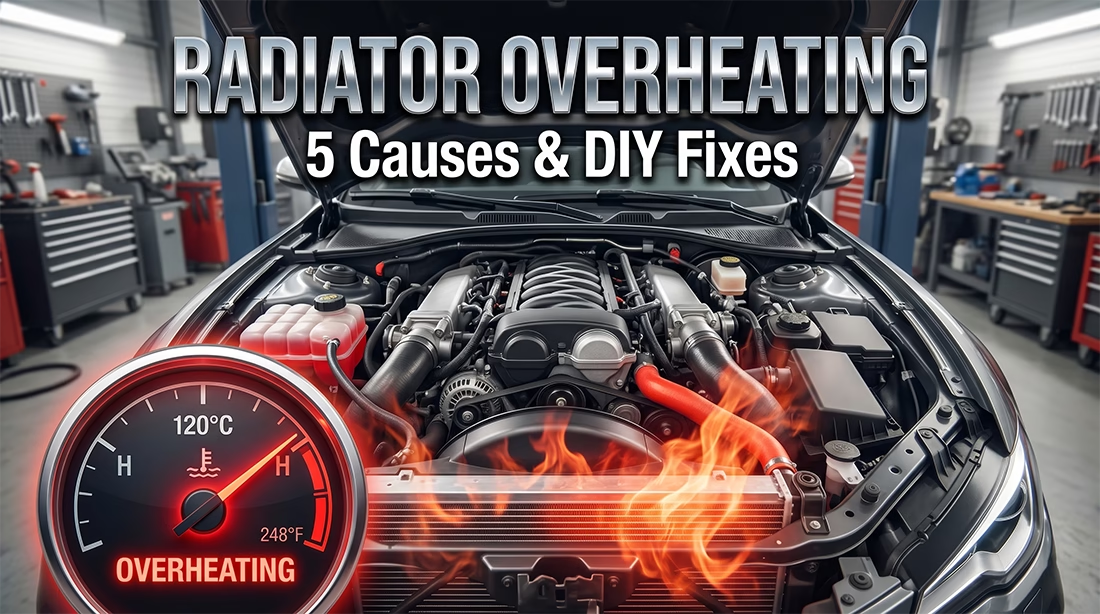
Your temperature gauge just climbed into the red. You feel a sudden wave of heat. You know you must pull over. But what happens next? Many drivers panic. They keep driving to reach home. A few extra minutes can warp metal. That turns a small repair into a massive bill.
This guide will help you stay calm. You will learn exactly what causes a radiator to overheat. You will spot early warning signs before damage occurs. We will walk through safe home checks. You will get clear steps to handle common issues. We will also show you when to stop and call a pro.
Safety always comes first. Never open a hot radiator cap. Hot coolant sprays like boiling water. Wait until the engine cools completely. Put on thick gloves and eye protection. Follow these simple rules. You will avoid painful burns.
Let’s find the root problem. Let’s fix it fast. Let’s keep your car running smooth.
Quick Answer: The 5 Most Common Causes
You want a fast answer. You probably wonder why is my car overheating when it ran fine yesterday. The truth stays simple. Most heat problems trace back to five broken parts. Knowing them will save you time and money.
- Low coolant tops the list. Small leaks hide under the hood. A loose clamp or cracked hose drips fluid away. The system loses its cooling power. The engine runs hot and heavy.
- A stuck thermostat blocks fluid flow. This small valve controls how coolant moves through the engine. It can freeze shut after years of heat cycles. Hot liquid stays trapped. The engine temperature climbs fast.
- A failing water pump slows circulation. You might spot water pump leak signs near the drive belt. A worn bearing grinds or squeals under the hood. The fluid moves too slow to pull heat away.
- Dirt and grime clog the radiator front. Bugs, leaves, and road spray pack into the thin metal fins. Fresh air cannot pass through. The heat stays locked inside the core.
- A broken cooling fan stops airflow. Cars need extra wind when they sit in traffic. A dead motor or blown fuse leaves the engine to bake. You will see radiator overheating symptoms the moment you stop at a red light.
These five causes cover most real-world cases. A careful DIY radiator fix solves many of them. You might only need a quick cooling system flush or a simple thermostat replacement. Let’s break down each part next. We will show you how to test them safely and fix them right.
How a Car Cooling System Actually Works
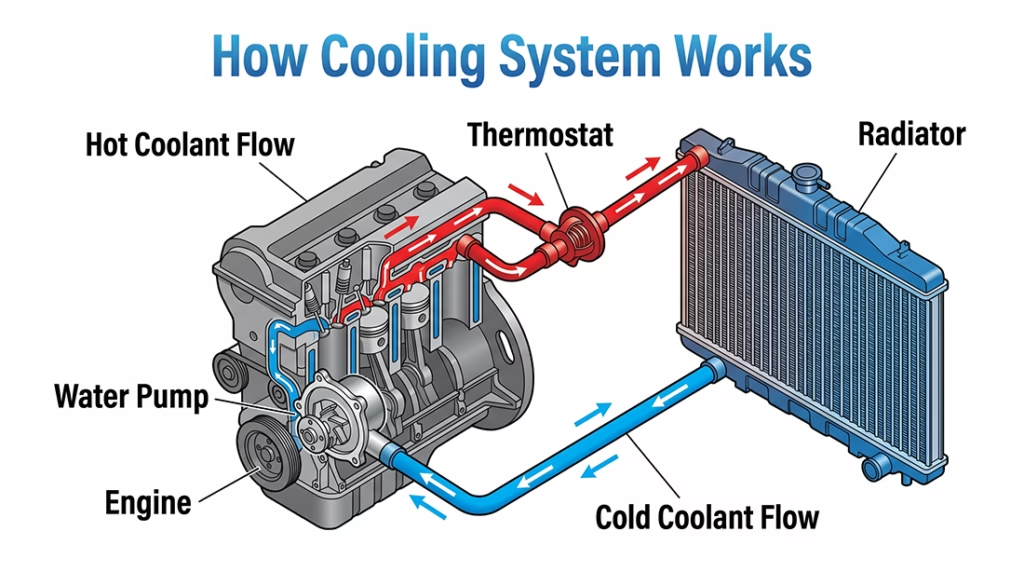
Your engine burns fuel to make power. That process creates intense heat. Without a clear escape path, metal parts melt. Your cooling system stops this from happening. It moves hot liquid away from the engine. It drops the heat into fresh air. It sends cool liquid back inside to repeat the cycle.
The radiator sits at the front. Air rushes through its thin metal fins. This air pulls heat from the flowing liquid. Coolant travels through strong rubber hoses. It passes a small valve called a thermostat. That valve opens when the engine warms up. It closes when the engine stays cold. A water pump pushes the liquid through the loop. A pull fan kicks in when you stop at lights.
Every part works as a team. One weak link breaks the chain. A stuck valve traps heat. A slow pump leaves hot fluid sitting still. Dirty fins block fresh air. Many drivers stare at the gauge and ask exactly why is my car overheating in mild weather. The system needs clear paths. Keep those paths clean. Keep your parts moving. Your engine will thank you with long life.
Warning Signs Your Radiator Is Overheating
Your car gives clear signals before it breaks. Watch the dashboard closely. The temperature gauge climbs past the center mark. A red warning light flashes on. Modern cars make a loud beep to grab your focus. Do not ignore these alerts.
You will also notice physical clues. A sweet smell fills the cabin. White steam rises from under the hood. Hissing sounds mean hot liquid hits hot metal. Look under the car for fresh puddles. The fluid runs green, pink, or bright orange. Your cabin heater may blow cold air too. That happens because the system lacks hot fluid to warm the vents.
Here is a quick safety rule. Pull over the moment you see steam. Turn off the air conditioner. Crack your windows. Shut the engine completely. Step away and wait for heat to fade. Pushing a hot car causes permanent damage. You want these radiator overheating symptoms to act as your clear stop sign. Heed them early. Save your wallet later.
Step-by-Step: DIY Diagnosis Guide
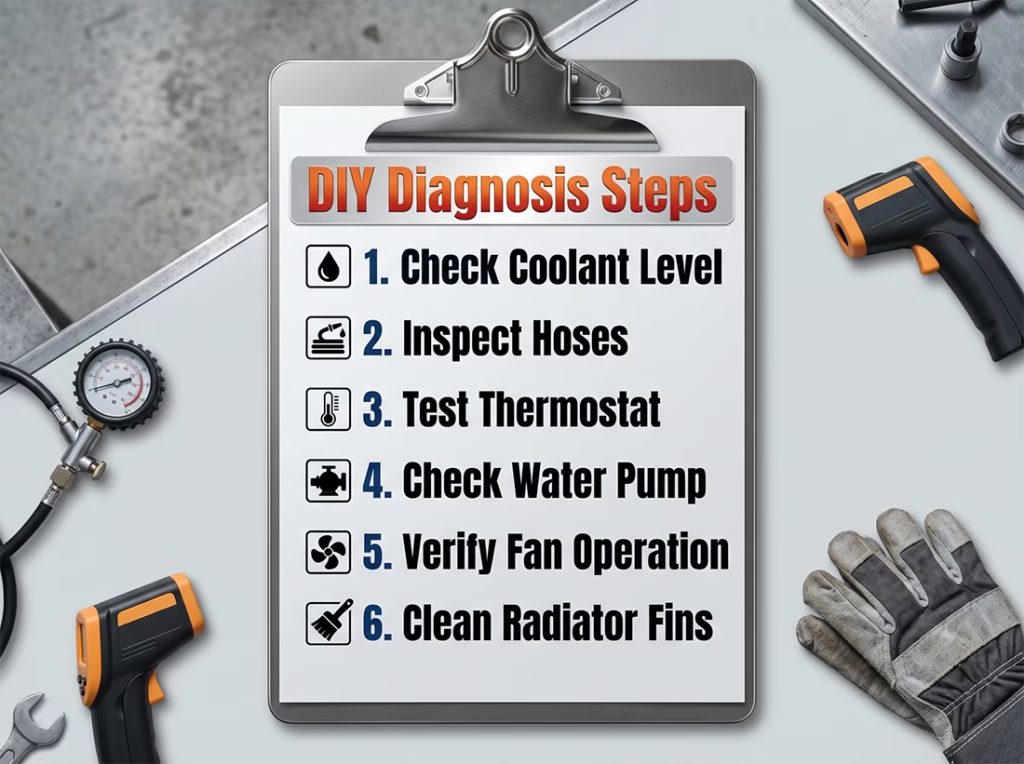
You can track down most problems with simple checks. Grab your basic tools before you start. A pressure tester finds hidden leaks fast. An infrared thermometer spots hot zones. A simple scanner reads live engine data. These tools pay for themselves.
Step 1: Check the coolant level when the engine stays cold. Pull the cap slowly if the car sat overnight. Top it off with the correct mix only.
Step 2: Trace every rubber hose with your hands. Squeeze them gently to find soft spots or cracks. Look for damp stains near the metal clamps.
Step 3: Test the flow valve with live data. Warm the engine and watch the temperature readout. The valve should open near the normal range. A steady climb means a quick thermostat replacement will restore proper flow.
Step 4: Listen closely to the pump while the engine idles. Grinding or squealing points to worn bearings. Check the small drain spot for fresh drops. Those drops confirm common water pump leak signs.
Step 5: Turn on the air conditioning and check the fan. The blades must spin at idle. A silent fan means a bad relay or dead motor. Swap the cheap fuse first to rule out easy fixes.
Step 6: Shine a bright light through the radiator front. Look for packed dirt, dead bugs, or bent plates. Gently spray the core with low-pressure water. Heavy grime blocks airflow and calls for a fresh cooling system flush.
Take your time with each step. Write down what you find. A methodical approach beats random guessing. A safe DIY radiator fix always starts with honest testing. Most drivers finish this check in under an hour. You will know exactly which part needs a new swap.
Extended DIY Fixes (Cause-by-Cause Solutions)
You found the weak spot. Now you need a clear plan. Each part needs a specific fix. Follow these steps carefully. Work slow. Double check your work. Your engine deserves a safe approach.
Low Coolant or Small Leaks
Top off the tank first. Use the exact fluid your maker recommends. Mix it with clean water at a fifty to fifty ratio. Find the drip source next. Replace cracked hoses with fresh ones. Swap out rusted clamps for tight steel bands. Run a pressure test to catch slow drips. Avoid quick patch bottles for long term use. They mask real problems. They clog tight passages. Fix the leak instead. This simple DIY radiator fix saves your block from dry runs.
Stuck or Broken Thermostat
Drain half the coolant into a clean pan. Remove the metal housing near the top hose. Pull the old valve. Clean the mating surface until it shines. Drop in the new part with a fresh gasket. Tighten bolts in a star pattern. Bleed trapped air by loosening the highest hose clamp slightly. Refill the system. Start the engine. Watch the gauge climb. A smooth thermostat replacement stops heat spikes fast. Wait for full heat. Turn the heater on full blast. Burping out air takes patience. Do it right once. Skip the guesswork later.
Water Pump Failure
Listen for loud grinding near the front belt. Check the tiny drain hole for fresh drips. Those drops match clear water pump leak signs. You must remove the drive belt first. Unbolt the old unit. Wipe the engine face clean. Apply a thin layer of sealant if the manual allows. Bolt the new pump in place. Refill coolant. Run the engine to check for drips. A slow pump kills your engine. A fresh unit restores strong flow. Take your time with belt routing. Wrong routing breaks new parts.
Clogged Radiator
Drain the old fluid completely. Run clean water through the core until it runs clear. Heavy sludge needs a proper cooling system flush. Follow the bottle instructions closely. Do not rush the rinse. Inspect the front fins with a bright light. Straighten bent plates with a small plastic comb. Rinse bugs and dirt with low water pressure. High pressure bends the metal. Good airflow keeps temps low. A clean core acts like a fresh lung. Your engine breathes better.
Cooling Fan Issues
Check the fuse box first. Swap a matching relay to test power. Listen for the click when the engine warms up. No click means a bad circuit. Test the motor wires with a basic meter. Dead wires need a fresh harness. A silent fan causes quick heat spikes. Clean the blades and clear the shroud. Debris blocks strong wind. Replace a worn motor before summer hits. You will avoid roadside stress.
Prevention: Keep Your Cooling System Healthy
You fixed the issue. Now you must stop it from returning. Heat damage builds over time. Simple habits block big repair bills. Follow this short checklist. Your car will thank you.
Change your fluid every two to three years. Old fluid turns acidic. Acid eats seals and metals. Always match the coolant type to your car manual. Mixing colors causes thick sludge. Sludge stops flow fast. Inspect belts and hoses during every oil change. Press the rubber with your thumb. Soft spots mean trouble. Rinse the front fins with a garden hose twice a year. Low pressure works best. Keep dirt from packing in.
Track your service dates with a simple phone app. Tools like maintenance trackers send smart reminders. You will never miss a flush again. Prevention beats panic every single time.
When DIY Isn’t Enough (Call a Pro)
You want to save money. You want to learn. But some jobs exceed home tools. Pushing past your skill limit costs more in the end. Know your limits early. Call a trusted shop when you see these signs.
White smoke pours from your tailpipe. Your oil looks like thick chocolate milk. Bubbles race through the coolant tank. These signs point to a blown head gasket. Internal pressure escapes. Metal warps fast. A home fix cannot seal cracked heads.
A cracked engine block shows deep leaks. Fluid seeps into cylinder walls. You need machine shop tools. Transmission lines inside the tank can fail too. Mixed fluids destroy both systems. Complex wiring faults hide behind dash panels. Bad sensors feed wrong data to your computer.
Guessing causes expensive mistakes. You also need a lift for heavy drops. You need torque wrenches for exact bolt tension. Missing specs ruins new parts.
I will give you honest advice. Stop when you feel lost. Pay a fair rate for expert hands. A three hundred dollar bill beats a three thousand dollar engine swap. Your safety matters most. Your peace of mind matters more. A real mechanic spots hidden damage you might miss. Hand them the keys. Let them do the heavy work. You keep driving longer.
Frequently Asked Questions
Can I drive with an overheating radiator?
No. Stop the car right away. Driving with high heat warps metal parts fast. A short trip can ruin your whole engine. Tow it to a safe spot. Fix the problem before you move again.
How much does a radiator repair cost?
Prices change by car and location. A simple hose swap might cost under fifty dollars. A new radiator or water pump can run a few hundred. Major engine work costs much more. Catching issues early saves you big money.
Does stop-leak work long-term?
Not really. These bottles seal small holes for a short time. They also clog tight passages in your system. You still need a real repair later. Fix the leak properly. Your engine will run better for longer.
How often should I flush my radiator?
Flush it every two to three years. Or follow the miles in your owner manual. Old fluid turns acidic and eats metal. Fresh fluid protects seals and keeps heat moving. Set a phone reminder so you never forget.
Can low oil cause overheating?
Yes, it can. Oil helps pull heat from moving parts. Low oil means more friction and more heat. Check your dipstick every few weeks. Top it off if it runs low. This simple habit prevents many cooling issues.
Final Thoughts & Next Steps
Heat kills engines fast. But you hold the power to stop it. You now know what causes a radiator to overheat. You can spot early signs before damage starts. You have clear steps to test and fix common problems at home.
Keep this simple rule close. Cool engines last longer. Check your coolant level once a month. Listen for strange noises under the hood. Act fast when the gauge climbs. Small care today prevents big bills tomorrow.
Want a free helper? Grab our printable diagnostic checklist. It walks you through each test in order. Keep it in your glove box. Use it when warning lights flash. You will feel calm and ready.
Take action now. Pick one task from this guide. Top off your coolant. Inspect your hoses. Set a maintenance reminder on your phone. Small steps build big confidence. You can handle this.
I will leave you with honest advice. DIY saves money when you stay safe. But pride costs more than a pro repair. Call a trusted mechanic when you feel stuck. Your car deserves expert care. You deserve peace of mind. Drive smart. Stay cool. Keep rolling.