
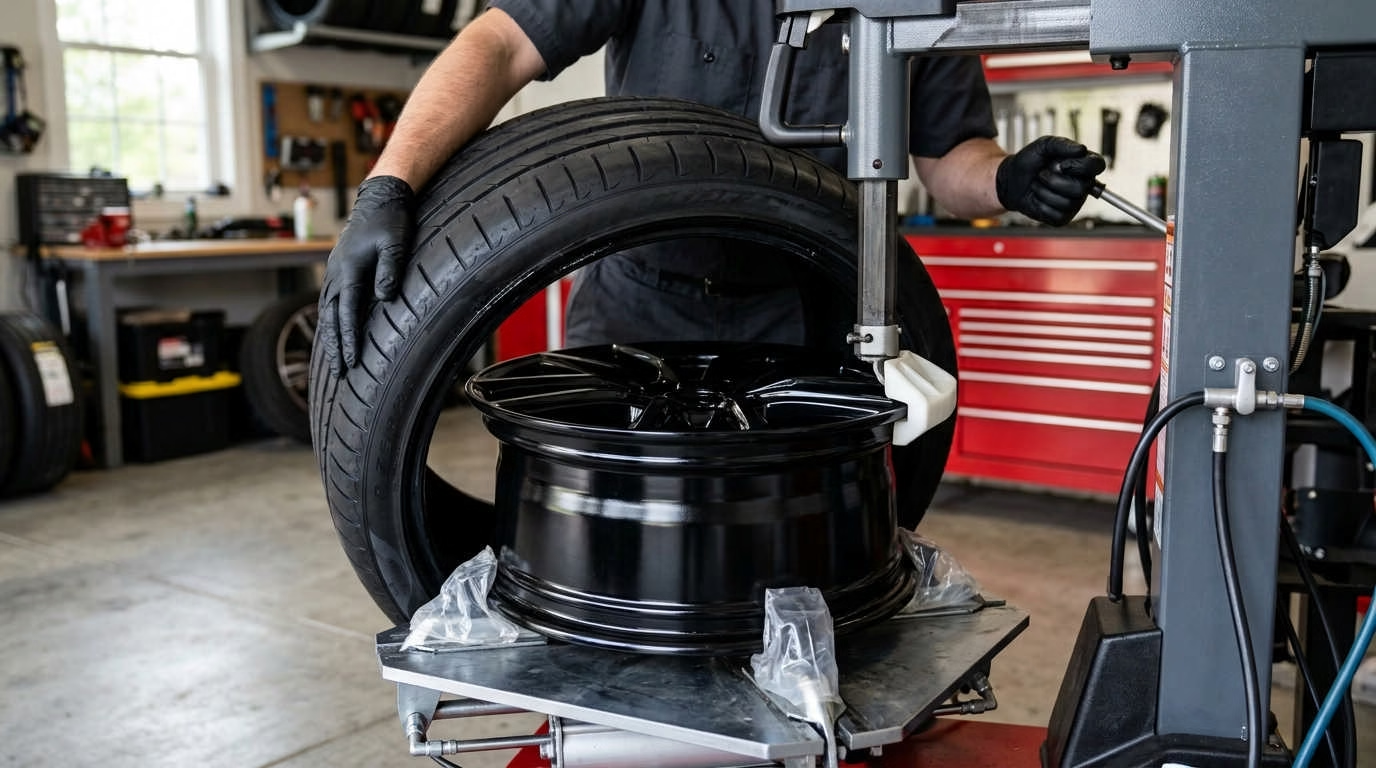
Before I ranked these tire changers, I reviewed a wide range of owner feedback and buyer discussions. The list reflects patterns reported after real use. It does not rely on product claims alone.
A tire changer that won’t scratch rims does not truly exist. Every machine can damage a wheel if its setup is wrong. Worn parts, trapped grit, and poor technique can also leave marks.
Still, some tire changers are much safer than others. The best options use plastic contact parts, protected clamps, and controlled tool movement.
The Hunter Revolution offers the best overall protection for costly wheels. The Coats 5060EX is a strong shop-grade choice. A Ranger R76-series machine may suit a serious home garage better.
Budget and manual changers can also work. However, you must add the right guards and take more care.
Quick answer: Choose a center-clamp or leverless machine for costly wheels. For a standard rim-clamp machine, use a clean plastic duckhead, covered jaws, and lots of tire lube.
Quick Comparison of the Best Rim-Safe Tire Changers
← Swipe to compare all models →
| Feature | Hunter Revolution | Coats 5060EX | Ranger R76-Series | VEVOR / Budget | Manual Portable |
|---|---|---|---|---|---|
| Best For Use Case | High-End Shops | Pro Repair Shops | Serious Home Garages | Budget Home Users | Rare / Mobile Use |
| Protection Rim Safeguarding | Center clamp & leverless tools — zero-contact design | Plastic head option & protected clamp jaws | Nylon tool head, covers & assist-arm options | Plastic upgrades & aftermarket rim guards | Rim guards & covered hand tools |
| Clamping Wheel Capacity | Automatic center-clamp system, no manual adjustment | Rim-clamp design, professional-grade jaws | Internal 8″–26″ • External 10″–30″ RimGuard™ clamps | 8″–16″ manual clamp range | Varies by model; manual positioning |
| Power Drive System | Fully automatic, motorized assist | Electric turntable, pneumatic bead breaker | High-torque electric turntable, reversible direction | Manual / pneumatic assist | Entirely manual; operator effort required |
| Bead Breaking System | Integrated automated bead breaker | Pneumatic bead breaker with guard options | Bilateral pneumatic, stainless steel cylinder, multi-axis blade | Basic manual or pneumatic blade | Hand-operated bead breaker bar |
| Assist Low-Profile Help | Leverless head handles run-flats automatically | Assist arm available for stiff sidewalls | Tilt-back tower, drop-center tool, top-bead rollers, TurboBlast™ | Limited; skill-dependent | None; fully manual technique |
| Weight Portability | Heavy floor unit; permanent install | Heavy floor unit; permanent install | Heavy floor unit; needs space, air & power | ~31 lbs; portable and compact | Lightest; truly portable & mobile |
| Drawback Key Limitation | ⚠ Very high cost of entry | ⚠ Used units may need new guards | ⚠ Needs space, shop air & proper power | ⚠ Build quality can vary | ⚠ Requires more effort & skill |
| Check Price | Check Price | Check Price | Check Price | Check Price |
Important: Check the exact model before you order or use one. Power needs, wheel capacity, and included guards can vary.
What Makes a Tire Changer Safe for Alloy Rims?
A high price does not make a tire changer safe. The parts that touch the wheel matter more.
You should also look at how the machine holds the wheel. A good setup limits bare metal contact and keeps the tire bead under control.
Plastic or Nylon Duckhead
The duckhead is the tool that guides the tire bead. It sits close to the edge of the wheel during mounting.
A metal duckhead may scrape the finish if it touches the rim. A nylon or plastic head creates a softer contact point.
However, plastic does not make the machine damage-proof. An old head may develop deep cuts. Those cuts can trap dirt, metal dust, and sharp grit.
Check the head before each valuable wheel. Replace it if you find:
- Deep grooves
- Cracks
- Loose mounting parts
- Sharp edges
- A warped shape
- Exposed metal
- Grit pressed into the surface
Keep at least one spare head near your machine. It costs far less than repairing a painted wheel.
Protected Clamping System
The clamps hold the wheel while the turntable moves. Their design affects both grip and scratch risk.
Outside Clamping
Outside clamping grips the wheel near its outer edge. It can provide a firm hold.
The downside is clear. The jaws sit close to a painted and visible area. One missing cover can leave a mark.
Before outside clamping, make sure:
- Every jaw has a fitted plastic cover
- No cover is split or loose
- The jaws are clean
- The wheel sits flat
- Clamp pressure is not excessive
Do not use tape as your main jaw cover. It can tear or slide without warning.
Inside Clamping
Inside clamping grips the inner edge of the wheel. Marks may be less visible in this area.
That does not make inside clamping risk-free. Bare jaws can still cut the finish. Too much force may also damage a thin or weak wheel.
Use clean jaw covers for both methods. Follow the machine maker’s setup for that wheel type.
Center Clamping
A center-clamp machine holds the wheel through its center hole. It does not need to grab the outer lip with four standard jaws.
This design can be safer for painted and custom wheels. It removes one common source of claw marks.
The correct adapter still matters. A wrong cone or plate can hold the wheel poorly. It may also place pressure in the wrong area.
Center clamping is a strong choice for:
- Forged wheels
- Painted alloy wheels
- Polished wheels
- Large custom wheels
- Reverse-mount wheels
- Wheels with delicate outer lips
Leverless Operation
A leverless machine does not need a standard tire iron for the main bead work. Its tool lifts and guides the bead instead.
That removes a common scratch source. A tire iron can slip, drag, or press against the wheel.
Leverless does not mean contact-free. The tools still work close to the tire and rim. Bad setup can damage the wheel, tire, valve stem, or pressure sensor.
The main benefit is control. You use less sudden force near the wheel edge.
Bead Breaker Protection
The bead breaker pushes the tire away from the wheel. Its shovel sits close to the rim during this step.
A bare shovel can scrape the wheel if it slips. A fitted plastic pad adds a useful barrier.
Position the shovel against the tire sidewall. Do not place it against the rim itself.
Also check the back side of the wheel. That area can be easy to miss, yet it still has a finished surface.
Assist Arm for Low-Profile and Run-Flat Tires
Low-profile and run-flat tires have stiff sidewalls. They resist movement and create more force near the duckhead.
An assist arm presses the bead into the wheel’s drop center. The drop center is the lowered channel inside the wheel.
This creates more slack. More slack means less strain on the tire and tool.
An assist arm can help with:
- Run-flat tires
- Short, stiff sidewalls
- Wide performance tires
- Large wheel sizes
- Hard or cold tire rubber
If these tires make up most of your work, see this guide to the best tire changer for low-profile tires.
1. Hunter Revolution: Best for Expensive and Delicate Wheels
The Hunter Revolution is built for busy professional shops. Its automated process reduces guesswork during each tire change.
That does not make it fully touch-free. Tools still act on the tire assembly. Yet the machine limits several forms of risky hand work.
Why It Is the Safest Overall Choice
The machine uses a repeatable process for mounting and removal. That helps reduce changes in technique between workers.
It also holds the wheel through the center. Standard outer jaws do not clamp the painted rim lip.
The leverless tool system removes the need for common pry-bar work. This can lower the chance of a bar slipping across the finish.
Its main strengths include:
- Center clamping
- Automatic tool movement
- Leverless bead control
- Less reliance on hand force
- Repeatable operating steps
- Better support for stiff tires
A skilled worker can still cause damage. Yet the machine makes safe steps easier to repeat.
Rim Protection Features to Highlight
The center clamp is the main wheel-saving feature. It holds the wheel without four jaws gripping the outer lip.
Its controlled tools also reduce sudden movement. That matters with stiff tires, where force can rise fast.
Key protective features include:
- Center-mount wheel holding
- Controlled tool placement
- Leverless bead lifting
- Support for low-profile tires
- Less use of exposed hand tools
- Repeatable mounting steps
Correct adapters remain essential. A wheel must sit flat and stay firm through the full cycle.
Limitations
The Hunter Revolution is not a practical choice for most home garages.
Its main limits include:
- Very high purchase cost
- Large shop footprint
- Training needs
- Added adapter costs
- Service and upkeep costs
- More equipment than rare users need
It also cannot promise perfect results. Dirt, wrong adapters, and poor setup can still cause damage.
Best For
The Hunter Revolution makes the most sense for:
- High-end tire shops
- Car dealerships
- Performance shops
- Custom wheel specialists
- Busy service centers
- Shops that handle run-flat tires
- Businesses that want steady work steps
It may also reduce differences between workers. That can matter in a shop with several staff members.
Bottom Line
Choose the Hunter Revolution if wheel care and steady results matter most. It offers the best mix of control, center clamping, and reduced pry-bar use.
Its price makes it hard to justify at home. For a busy shop, though, the added control may be worth it.
2. Coats 5060EX: Best Traditional Professional Tire Changer
The Coats 5060EX follows a more common rim-clamp design. Many service workers already know how this style operates.
It can handle alloy wheels with care. However, its protective parts and setup need close checks.
Why It Earns a Place on the List
This Coats machine offers a familiar shop layout. Its controls are simple for trained users.
Replacement parts are also widely available. That matters because plastic heads and jaw covers wear out.
A good setup may include:
- A compatible plastic duckhead
- Plastic clamp covers
- Correct head clearance
- A protected bead breaker
- Clean contact surfaces
- The proper wheel position
Used machines are common. This can make the 5060EX easier to find than some newer shop models.
Rim Protection Features to Discuss
The 5060EX can use a plastic mount and demount head. This helps keep bare steel away from the wheel lip.
Protected clamp jaws add another layer. They reduce direct contact between the steel jaws and the wheel.
The tool-head gap also needs care. The duckhead should sit close enough to guide the bead. It should not rest against the wheel.
Useful protective parts include:
- Plastic or nylon duckhead
- Covered clamp jaws
- Bead breaker pad
- Protected tire iron
- Clean turntable pads
- Spare wear parts
These parts must fit the machine. A loose or wrong-sized cover can come off during use.
Important Warning
Do not assume every Coats 5060EX has a plastic duckhead. Some machines have metal heads. Others may use old plastic parts.
A used machine may also have:
- Missing clamp covers
- Rough jaws
- A bent tool shaft
- Loose turntable parts
- Air leaks
- Old repairs
- Exposed bolts
Inspect the exact unit before placing a good wheel on it. The model name alone does not prove it is safe.
Also check the shaft before buying a new duckhead. Different versions may need different parts.
Limitations
A standard rim-clamp machine leaves more room for human error. You must position the wheel, set the tools, and control the bead.
Its main drawbacks include:
- More exposed moving parts
- Clamp-cover wear
- Greater need for hand control
- Air compressor needs
- A large shop footprint
- Risk from poor used-machine care
It may also struggle with stiff tires without an assist arm. More force can increase the risk of contact.
Best For
The Coats 5060EX is a good fit for:
- Independent repair shops
- General tire shops
- Used-equipment buyers
- Skilled home shop owners
- Workers who know rim-clamp machines
- Shops that need easy access to parts
It suits buyers who want a known shop design. It does not offer the same automation as the Hunter.
Bottom Line
The Coats 5060EX can treat alloy wheels well. It needs a sound plastic head, covered jaws, and careful setup.
Inspect used units with extra care. A worn protective part can turn a trusted machine into a scratch risk.
3. Ranger R76-Series: Best for Serious Home Garages
Ranger’s R76-series machines sit between cheap home tools and premium shop gear. They appeal to serious home users and small service shops.
Check the full model number before comparing features. Different versions may have different arms, power needs, and wheel limits.
Why It Works for Prosumers
A powered turntable saves time and effort. It also offers more control than many basic manual changers.
Some R76-series setups include useful protection for alloy wheels. Others may need added parts.
Look for:
- A nylon duckhead
- Plastic jaw covers
- An assist arm
- A protected bead breaker
- Slow and steady tool control
- Easy access to replacement parts
An assist-arm model is often worth the added space. It can reduce force with wide and stiff tires.
Rim Protection Features to Look For
The plastic duckhead should be your first check. Make sure it fits well and has no sharp edges.
Then inspect the jaws. Each clamp needs a fitted cover that stays in place under pressure.
Other useful features include:
- Adjustable tool-head clearance
- A bead pressing arm
- Plastic rim guards
- A covered bead shovel
- Protected hand tools
- Replaceable plastic inserts
Ask what comes with the exact model. Product photos may show parts that cost extra.
Limitations
A Ranger machine still needs a proper work area. It is not a small tool you can place on a shelf.
Plan for:
- Enough floor space
- Safe unloading
- A firm mounting point
- A suitable air compressor
- Correct electrical power
- Room around the machine
- Storage for adapters and guards
Do not assume every version needs the same voltage. Check the data plate and manual.
The cost can also be hard to justify for two tire changes per year. You may need a wheel balancer too.
Best For
A Ranger R76-series machine may suit:
- Serious home mechanics
- Small repair shops
- Car clubs
- Shared workshops
- Restoration garages
- Owners with several vehicles
- Part-time tire installers
It works best when you use it often enough to build skill.
Bottom Line
A Ranger machine offers a sensible middle path. It gives you powered controls without the cost of a top shop system.
Choose a model with an assist arm and full plastic protection. Those features matter more than cosmetic extras.
4. VEVOR or Similar Budget Tire Changer: Best Low-Cost Powered Option
Low-cost powered changers attract home users for a clear reason. They cost much less than major shop machines.
They can work well after careful setup. Still, you should not place a costly wheel on one straight from the crate.
Why Budget Buyers Consider It
A budget changer gives you a powered turntable at a lower entry cost. It can also save effort compared with hand tools.
These machines may suit occasional tire work. You can replace or add many plastic parts without high costs.
The appeal comes from:
- Lower purchase price
- Powered wheel rotation
- Simple controls
- Common replacement guards
- Faster work than a manual tool
- A small-shop style layout
That low price may come with extra setup work. Treat this as part of ownership.
Required Upgrades Before Using It on Nice Wheels
Inspect and prepare the machine before the first good wheel.
Use this checklist:
- Check the factory duckhead.
Look for rough seams, sharp edges, and loose bolts. - Fit a good plastic duckhead.
Make sure the part matches the shaft. - Cover every clamp jaw.
Do not leave one bare contact point. - Add a bead breaker cover.
Secure it so it cannot slip. - Inspect the turntable.
Remove burrs, chips, and sharp edges. - Set the duckhead gap.
It must not drag on the wheel. - Check all bolts.
Loose parts can move under force. - Test the machine first.
Use an old steel or scrap wheel. - Keep spare guards nearby.
Plastic parts can fail during a job. - Stop if a cover shifts.
Do not try to finish one more turn.
A short test can reveal poor fit and machine flex. Fix those issues before using painted alloy wheels.
Quality-Control Issues to Address
Build quality may vary between units. One machine may arrive ready for setup. Another may need more work.
Possible issues include:
- Loose hardware
- Rough cast parts
- Poor tool alignment
- Thin protective covers
- Weak instructions
- Air leaks
- Hard-to-find parts
- Changes between model runs
Check all moving parts without a wheel installed. Watch for wobble, play, and uneven movement.
Do not grind or alter a load-bearing part unless you know the effect. A local equipment technician may be the safer choice.
Best For
A budget tire changer can suit:
- Home garages
- Light tire work
- Owners of several older cars
- Users who enjoy machine setup
- Small side projects
- Standard steel wheels
- Common alloy wheels
It works best for a patient user. You need time to inspect, adjust, and test it.
Who Should Skip It
Skip this category if you:
- Work on rare wheels
- Run a high-volume shop
- Need strong parts support
- Expect perfect setup from the box
- Do not want to replace guards
- Lack room for safe testing
- Have no experience with tire tools
Paying a skilled shop may cost less than repairing one damaged wheel.
Bottom Line
A low-cost changer can be made more rim-safe. Yet the protective upgrades are not optional.
Plan to inspect every contact point. Test the machine before trusting it with a valuable wheel.
5. Manual Portable Tire Changer: Best for Occasional Use
Manual tire changers appeal to users with little space. They also work without a powered turntable.
Their simple design keeps the cost low. It also places more control and risk in your hands.
Why People Buy One
A portable changer may work well for rare tire jobs. You can store many models between uses.
Common reasons to choose one include:
- Low cost
- Small storage needs
- No powered turntable
- Easy transport
- Simple repairs
- Use away from a full shop
They are popular for trailer, lawn, track, and off-road work. Some premium portable systems offer better control than basic stands.
Why Manual Machines Carry More Scratch Risk
You supply most of the force on a manual changer. That force often passes through a long mounting bar.
If the bar slips, it may hit the wheel. A thin plastic guard may also move or tear.
Risk rises due to:
- Exposed steel tools
- Long lever movement
- Tire movement
- Loose wheel holding
- High hand force
- Poor drop-center control
- Thin or worn plastic parts
Stiff sidewalls make the job harder. If you need extreme force, stop and reset the tire.
How to Make a Manual Changer Safer
Use proper plastic guards at every contact point. Avoid relying on tape alone.
Follow these steps:
- Clean the wheel and changer.
- Secure the wheel with the right adapter.
- Cover all clamps and center posts.
- Apply tire mounting lube to both beads.
- Keep the bead in the drop center.
- Use a protected mounting bar.
- Move the bead in small steps.
- Check each guard as you work.
- Stop if the tire binds.
- Practice on an unwanted wheel first.
You may be able to work from the back of some wheels. This can hide a minor mark. It does not prevent damage, though.
Make sure the wheel design allows that method. Reverse-mount wheels often need a different process.
Harbor Freight Versus Premium Manual Systems
Basic stands and premium portable systems serve different users.
Basic Manual Changer
A basic changer gives you a firm base and simple tire tools. It may need added padding and rim protection.
Its strengths include:
- Very low cost
- Simple construction
- Easy storage
- Few parts to repair
Its weaknesses include:
- More exposed metal
- Less wheel control
- More hand force
- Greater need for custom guards
- Poor fit with some wheel sizes
It works best for steel wheels and basic tire work.
Premium Portable System
A premium portable system often controls the wheel and tools better. It may include model-specific adapters and plastic contact parts.
Its benefits may include:
- Better bead control
- More stable wheel holding
- Improved tool angles
- Better portability
- Less direct metal contact
Plastic parts can still crack or wear. Inspect them before every job.
Best For
Manual and portable changers may suit:
- Track day users
- Off-road riders
- Trailer owners
- Small equipment owners
- Occasional home mechanics
- People with limited floor space
- Mobile repair kits
For rare or costly car wheels, a professional shop may remain the safer choice.
Bottom Line
A manual changer saves money and space. It also asks more from you.
Use it slowly. Protect every contact point and stop before force gets out of control.
How to Choose a Tire Changer That Won’t Damage Rims
The right machine must fit your wheels, tires, space, and skill. Rim safety is only one part of the choice.
Start with the hardest tire and most costly wheel you expect to handle.
Match the Machine to Your Wheel Types
Steel wheels can take more abuse than many finished alloy wheels. Painted and polished rims need cleaner tools and softer contact points.
Think about whether you will handle:
- Steel wheels
- Painted alloy wheels
- Polished aluminum
- Chrome finishes
- Powder-coated wheels
- Forged wheels
- Reverse-mount wheels
- Beadlock wheels
- Motorcycle wheels
- Run-flat tires
- Low-profile tires
Reverse-mount wheels may need a flange plate. Motorcycle wheels often need special clamps or adapters.
Do not force an unusual wheel into a standard setup. Find the correct adapter first.
Check Wheel Diameter and Width Capacity
A machine’s listed wheel size may not tell the full story. Clamp position can change the usable range.
Check:
- Smallest wheel diameter
- Largest wheel diameter
- Maximum wheel width
- Maximum tire diameter
- Inside clamp range
- Outside clamp range
- Maximum wheel weight
Also measure your widest tire. A machine may accept the wheel diameter but lack space for a wide tire.
Check Power and Air Requirements
Many powered tire changers need both electricity and compressed air.
Confirm:
- Required voltage
- Plug type
- Power phase
- Current draw
- Air pressure range
- Compressor output
- Air-line size
- Circuit needs
Do not trust a broad product family name. The exact model may use different power.
Allow room for the compressor as well. Noise and airflow may affect where you place it.
Look at the Included Protective Parts
Some product photos show optional parts. Read the included-parts list before comparing value.
Look for:
- Plastic duckhead
- Spare duckhead
- Clamp jaw covers
- Bead breaker cover
- Rim protectors
- Protected tire iron
- Centering cones
- Flange plates
- Reverse-mount adapter
- Motorcycle adapters
A complete set of guards saves time. More importantly, matched parts are less likely to slip.
Consider Replacement-Part Availability
Plastic parts wear out by design. That is better than letting the metal wheel take the wear.
Before choosing a machine, check access to:
- Duckheads
- Jaw covers
- Bead breaker pads
- Air seals
- Pedal parts
- Valves
- Belts
- Assist-arm parts
- Adapter hardware
A cheap machine can become costly if simple parts are hard to find.
New Versus Used
A used shop machine may offer better build quality than a new budget unit. Its true condition matters more than its age.
New Machine Benefits
A new machine may give you:
- A warranty
- Complete guards
- Known history
- Current instructions
- Better parts support
- Safer electrical parts
You still need to check its setup. New does not always mean ready for delicate wheels.
Used Machine Risks
Inspect a used machine for:
- Missing plastic parts
- Worn clamps
- Bent tool posts
- Turntable play
- Air leaks
- Damaged pedals
- Poor wiring repairs
- Rust near moving parts
- Wrong replacement heads
Bring an inspection light. Run the machine through every motion before making a decision.
How to Change a Tire Without Scratching the Rim
A good machine only reduces risk. Your work steps decide what happens next.
Slow down before each point of contact. A ten-second check may prevent a costly repair.
1. Clean the Wheel and Machine
Grit can scratch a finish even through a plastic guard. Clean the wheel, clamps, duckhead, and turntable.
Use a clean brush and cloth. Remove:
- Sand
- Metal chips
- Old rubber
- Dried tire lube
- Rust flakes
- Small stones
Never place a finished wheel face-down on a dirty floor. Use a clean mat or padded stand.
2. Inspect Every Protective Part
Run your finger over each plastic surface. Feel for cuts, sharp edges, and trapped grit.
Check:
- Duckhead
- Jaw covers
- Bead breaker pad
- Rim protectors
- Mounting bar cover
- Centering cones
- Wheel supports
Replace a damaged part at once. Do not try to finish one more wheel with it.
3. Use Proper Tire Lubricant
Tire lube helps the rubber slide over the wheel. Dry rubber grips and pulls hard against the tools.
Apply lube to both beads. Cover the contact area without flooding the wheel.
Use a product made for tire mounting. Avoid random oils and petroleum products. They may affect rubber or leave a hard-to-clean mess.
4. Set the Duckhead Clearance
The duckhead should guide the bead without rubbing the wheel.
Set a small gap beside and above the rim. Allow for movement in the machine under load.
Check the gap again when:
- Wheel size changes
- The wheel profile changes
- You fit a new duckhead
- The tool post feels loose
- You work on a costly rim
Never assume the last setup is safe for the next wheel.
5. Keep the Bead in the Drop Center
The drop center is the low channel inside the wheel. It creates room for the bead to move.
If the bead climbs out, tension rises fast. The tire may pull the duckhead or bar into the rim.
Use a bead clamp or assist arm to hold it down. Stop the turntable if the bead starts to rise.
6. Protect the Wheel From the Tire Iron
Place a rim protector between the tire iron and wheel. Keep the tip away from the painted edge.
Do not drag the bar around the entire rim. Lift only as much bead as needed.
A leverless machine reduces this risk. If you use a bar, use slow and short movements.
7. Watch the Pressure Sensor
Many wheels have a tire pressure sensor near the valve stem. The bead or tool can break it.
Find the valve before you start. Keep track of its position as the wheel turns.
Follow the machine’s correct starting point. The safe position may change between mounting and removal.
8. Stop When Force Suddenly Increases
A sharp rise in force is a warning. Do not push harder without finding the cause.
Check for:
- A bead outside the drop center
- Too little lube
- A bad duckhead position
- A slipping clamp
- A wrong adapter
- A trapped sensor
- An unusual wheel design
Reset the tire and try again. More force is rarely the safest fix.
9. Inspect the Wheel Before and After Service
Check the wheel before placing it on the machine. Note any old chips, bends, or marks.
For customer wheels, take clear photos under good light. Capture:
- Outer lip
- Inner barrel
- Spokes
- Valve area
- Center hole
- Existing repairs
Inspect the same areas after the job. This protects both the wheel owner and the worker.
The $20 Rim-Safety Kit Every Tire Changer Needs
You do not need a large tool chest for basic rim care. A small kit can cover the most common risks.
Keep these items near the machine:
- Two spare plastic duckheads
- A full set of jaw covers
- Bead breaker cover
- Clip-on rim protectors
- A protected tire iron
- Tire mounting lube
- Soft cleaning brush
- Clean microfiber cloths
- Bright inspection light
- Painter’s tape
- Phone stand for photos
The exact cost will vary. The point is simple: keep low-cost wear parts ready.
Do not trust one old piece of plastic to protect a costly wheel. Replace it before it fails.
For a more comfortable shop setup, a stable mechanic stool with wheels may also help during cleaning and close inspection. Keep it clear of the turntable while the machine runs.
Common Causes of Scratched Rims
Most wheel scratches do not come from one major machine fault. They come from small issues that were missed.
Knowing these weak points makes damage easier to prevent.
Worn Plastic Duckhead
Problem: A worn duckhead may have deep cuts or exposed hardware. It can also hold sharp grit.
Solution: Replace the head when it becomes rough, loose, cracked, or misshapen. Do not wait for total failure.
Missing Clamp Covers
Problem: A bare steel jaw can leave a deep mark. A loose cover may also fall off during rotation.
Solution: Check all covers before clamping. Keep a full spare set near the machine.
Dirty Turntable
Problem: Dirt and metal chips may become trapped under the wheel. They can cut the finish during movement.
Solution: Brush and wipe the turntable after each job. Clean it again before working on a costly wheel.
Incorrect Duckhead Gap
Problem: A head set too close may drag on the rim. A head set too far away may lose control of the bead.
Solution: Set the gap for each wheel type. Check for tool-post flex as pressure rises.
Too Little Lubricant
Problem: A dry bead creates more drag. That pulls harder against the head and raises slip risk.
Solution: Use proper tire lube on both beads. Add more if the tire starts to bind.
Bead Outside the Drop Center
Problem: The tire loses needed slack. Force rises at the duckhead and wheel edge.
Solution: Press the bead into the drop center. Use an assist arm or bead-holding tool.
Wrong Adapter
Problem: The wheel may sit off-center or move under load. Pressure may also fall on a weak area.
Solution: Use the correct cone, flange plate, or wheel adapter. Do not make a close-enough part fit.
Rushing
Problem: You may miss a loose cover, dry bead, or bad tool angle.
Solution: Pause before clamping, bead lifting, and final rotation. Those short checks save time later.
Which Tire Changer Is Least Likely to Scratch Rims?
The Hunter Revolution is the best overall choice for costly wheels. Its center clamp and leverless process remove several common scratch points.
The Coats 5060EX is a strong standard shop machine. It can handle alloy wheels well with the right plastic head and guards.
A Ranger R76-series machine offers a practical home-shop balance. Look for an assist arm and full rim protection.
Your best choice by use is:
- Best for high-end professional work: Hunter Revolution
- Best standard shop machine: Coats 5060EX
- Best for a serious home garage: Ranger R76-Series
- Best low-cost powered choice: VEVOR or a similar machine after upgrades
- Best for portable use: A well-guarded manual system
- Best for rare home use: A trusted tire shop
The safest machine is not always the most costly one. It is the machine with clean guards, correct adapters, and a patient user.
FAQs
Is there a tire changer that cannot scratch rims?
No. Any tire changer can mark a wheel.
Center clamps, plastic tools, and covered jaws reduce the risk. They cannot protect against grit, worn parts, or poor setup.
Do plastic duckheads prevent all wheel scratches?
No. A plastic duckhead lowers the chance of bare metal contact.
It can still scratch a wheel if it is dirty, cracked, or set too close. Inspect it before each valuable rim.
Is a center-clamp tire changer safer than a rim-clamp machine?
A center clamp avoids gripping the outer lip with standard jaws. This makes it a good choice for costly wheels.
You still need the right adapters. The wheel must stay flat and secure.
Can a Harbor Freight tire changer be used without scratching rims?
It may work without damage after you add good guards. Your skill and setup will matter a lot.
Practice on an old wheel first. A basic manual changer is not my first choice for rare or polished rims.
Can I cover a metal duckhead with tape?
Tape can add a short-term barrier. It is not a sound long-term fix.
Tape may tear, wrinkle, or trap grit. A fitted plastic duckhead is the safer option.
How often should I replace a plastic duckhead?
There is no single time limit. Wear depends on use, tire types, and cleaning.
Inspect it before every valuable wheel. Replace it if it is cut, cracked, loose, rough, or warped.
Do I need an assist arm for low-profile tires?
You may not need one for every tire. Still, it makes stiff sidewalls much easier to control.
An assist arm keeps the bead in the drop center. This lowers force near the rim.
Should a wheel be clamped from the inside or outside?
Use the method approved for the wheel and machine. Both can work with clean, fitted covers.
Inside clamping may keep contact away from the front face. Outside clamping may provide a better hold in some cases.
Can tire lubricant damage a wheel finish?
A proper tire mounting lube should be safe when used as directed. Clean leftover product after the tire is fitted.
Avoid oils, fuel products, and random shop chemicals. They may affect rubber or stain the finish.
If rubber care is also part of your garage work, this guide to a car rubber seal restorer explains products meant for exterior seals. Do not use those products as tire mounting lube.
Is buying a tire changer worth it for home use?
It may make sense if you own several vehicles. It can also help with track tires or frequent seasonal swaps.
Include the full setup cost:
- Tire changer
- Wheel balancer
- Air compressor
- Electrical work
- Rim guards
- Adapters
- Tire lube
- Replacement parts
- Floor space
For one tire set every few years, shop service may cost less.
Conclusion
No tire changer that won’t scratch rims can offer a true zero-risk promise. The machine must work with clean guards, correct tools, and steady technique.
Choose a center-clamp or leverless machine for high-value wheels. If you use a standard changer, fit a good plastic duckhead and cover every jaw.
Most of all, stop when force rises. Check the bead, add lube, and reset the tools. That calm pause often prevents the scratch you were trying to avoid.