1. Why Lug Nut Torque Matters More Than You Think
Lug nuts aren’t just “tight enough” hardware. They’re a clamping system.
Your wheel stays on because studs stretch slightly when tightened. This creates clamp load. That load must be even across all studs.
Wrong torque causes predictable problems:
- Warped brake rotors feel like pulsation when braking. Uneven clamp load bends the rotor against the hub.
- Broken or stretched studs happen when you go too far. A stretched stud might not break right away. But it loses its grip over time.
- Loose wheels occur when nuts aren’t tightened evenly. Or when nobody checks after the joint settles.
This isn’t about preference. It’s not tradition. And it’s definitely not “how my buddy does it.” This is serious safety stuff. For more on proper tool selection, check out our best torque wrench Reddit guide.
2. What Torque Really Means (And Why Impact Guns Cause Damage)
Torque isn’t just “tightness.” It’s a measured input that creates clamp load.
Here’s the catch: most torque fights friction in threads and at the nut seat. Small friction changes cause big clamp load differences.
Impact guns create problems:
- They over-torque randomly. Final torque depends on gun power, battery level, socket condition, and how long you pull the trigger.
- They stretch studs beyond their safe limit. Once stretched, a stud can’t clamp properly anymore.
- They hide cross-threaded nuts. Impacts can force nuts onto damaged threads. You won’t know until it fails.
Use impacts for removal only. For installation, use the impact just to snug the nuts down. Then finish with a torque wrench. Learn more about proper tool use in our torque wrench calibration guide.
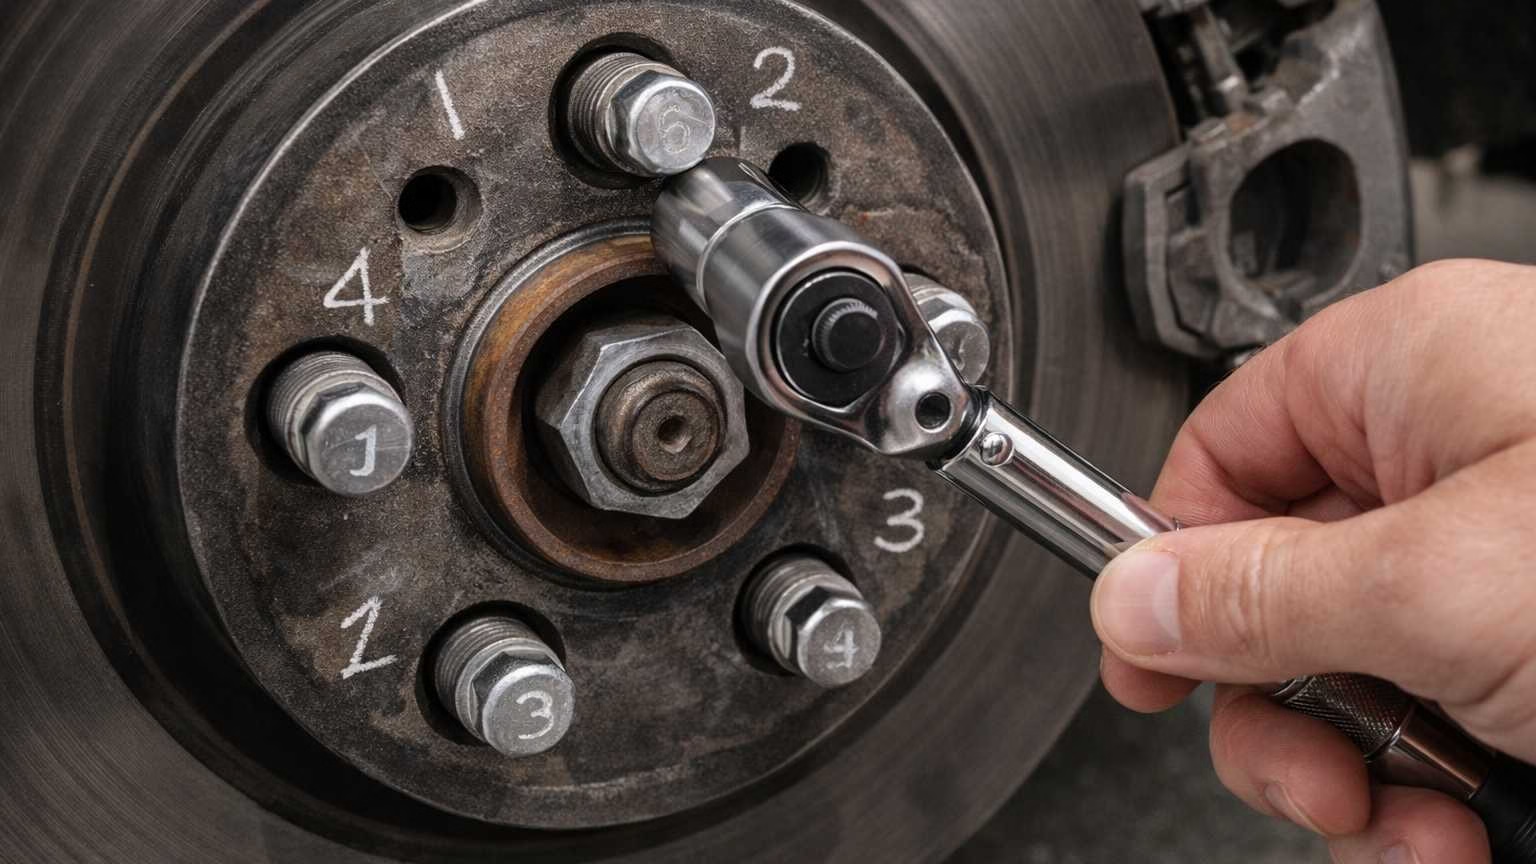
3. The Right Lug Nut Pattern (Star vs Circle)
The star pattern exists for one simple reason: it seats your wheel evenly.
When you tighten in a circle, the wheel can tilt slightly. This creates uneven pressure. Uneven pressure leads to warped rotors and loose wheels.
Use these patterns:
- 4-lug: Tighten corner-to-corner (like drawing an X)
- 5-lug: Use the classic star pattern (skip one lug each time)
- 6-lug: Tighten every other lug first, then the rest
- 8-lug: Tighten opposite pairs in a crisscross pattern
Here’s how to do it:
- Pick any lug to start
- Tighten the lug directly across from it
- Move to another lug across from your last one
- Keep “jumping across” until all lugs are tight
- Repeat the same pattern for your next pass
Goal first: even seating. Perfect torque comes second.
4. The Right Way to Torque Lug Nuts (Simple Steps)
Follow this workflow to prevent damaged studs and warped rotors:
Step 1: Hand-thread all nuts
- Turn each nut by hand for several rotations
- If a nut won’t spin easily, stop and check for cross-threading
- This simple step prevents most mysterious stud failures
Step 2: First snug pass
- With the wheel off the ground but flat against the hub, tighten nuts until they just touch
- Use a hand wrench or low-power setting only
- Tighten in your star pattern to center the wheel
Step 3: Pre-torque pass
- Make another pass at about half your final torque
- This helps distribute force evenly
- Still use the star pattern
Step 4: Final torque
- Set your wrench to the exact spec for your vehicle and wheels
- Torque in the same star pattern
- Stop when the wrench clicks—no extra pulls
Step 5: Use the right spec
- Don’t guess. Torque specs change based on stud size, wheel material, and seat design
- Aftermarket wheels often need different torque
- Find the correct spec from your vehicle or wheel maker
Pro tips:
- Match nut seats to your wheels (tapered, ball, or flat)
- Clean the wheel and hub faces first. Rust or dirt creates false torque readings
5. When to Re-Torque Lug Nuts (And Why)
Re-torquing isn’t old wives’ tales. It addresses real settling.
Why settling happens:
- Paint, rust, and tiny bumps compress under pressure
- Wheel and hub faces “bed in” after heating and cooling
- New wheels or cleaned hubs behave differently at first
Re-torque when:
- You’ve just put wheels back on after rotation or repair
- You installed new wheels, spacers, or lug nuts
- The wheel didn’t slide easily onto the hub
When to do it:
- After driving 25-50 miles (40-80 km)
- After normal driving with braking and turning
- When wheels are cool enough to handle safely
Skip re-torquing when:
- You did everything right the first time
- Mounting surfaces were clean and flat
- You’re not using new parts
Simple rule: Re-torque once after the first short drive. After that, just check periodically.
6. Anti-Seize on Lug Studs: The Dangerous Myth
Let’s be clear: anti-seize on lug studs is a bad habit that breaks studs.
Why it’s dangerous:
- Torque specs assume clean, dry threads
- Anti-seize is a lubricant that reduces friction
- Less friction means more stud stretch at the same torque setting
- You can over-clamp while your wrench still reads “correct”
Over-clamping causes:
- Stretched studs that later break
- Warped brake rotors
- Nuts that still seize due to other issues
What manufacturers want:
- Clean, dry threads unless they say otherwise
- No guessing or “just in case” lubing
Don’t use anti-seize on:
- Lug stud threads
- Nut seats (this is even worse)
- Any wheel fastener using published torque specs
Instead:
- Keep studs and nuts clean
- Clean rust from hub faces to prevent stuck wheels
- Replace damaged hardware instead of lubing it
For proper tool care, see our guide on torque wrench storage and calibration.
7. Common Lug Nut Mistakes (And How to Avoid Them)
These habits cause real damage:
- Over-torquing “for safety”
Result: Broken studs, warped rotors, nuts you can’t remove roadside. Correct clamp load is safer than extreme tightness. - Impact guns only
Result: Random torque, damaged threads, hidden cross-threading. You need a torque wrench for the final tightening. - Greased or lubed studs
Result: Over-clamping at “correct” torque readings. Lubrication changes everything. Your wrench can’t adjust for it. - Wrong tightening pattern
Result: Uneven wheel seating, vibrations, loosening wheels. The star pattern exists for good reason. - Skipping the re-torque
Result: Settling reduces clamp load. Wheels can work loose. The fix takes just minutes.
Watch for these hidden problems:
- Dirt between wheel and hub
- Wrong lug nut seat type for your wheels
- Swollen or damaged lug nuts
8. The Simple Truth About Wheel Safety
What really keeps wheels secure isn’t “tight.” It’s:
- The right star pattern to seat the wheel flat
- Correct torque with a proper wrench
- Clean, dry threads and seats
- One re-check after your first short drive
Remember this: Tight is a feeling. Torque is a measurement. Control the clamp load. Your safety depends on it.
For the best tools for the job, check our Icon vs. Tekton torque wrench comparison. And if you’re working on other vehicle maintenance, our best battery maintainer guide can help keep your car ready to go.
 1")