
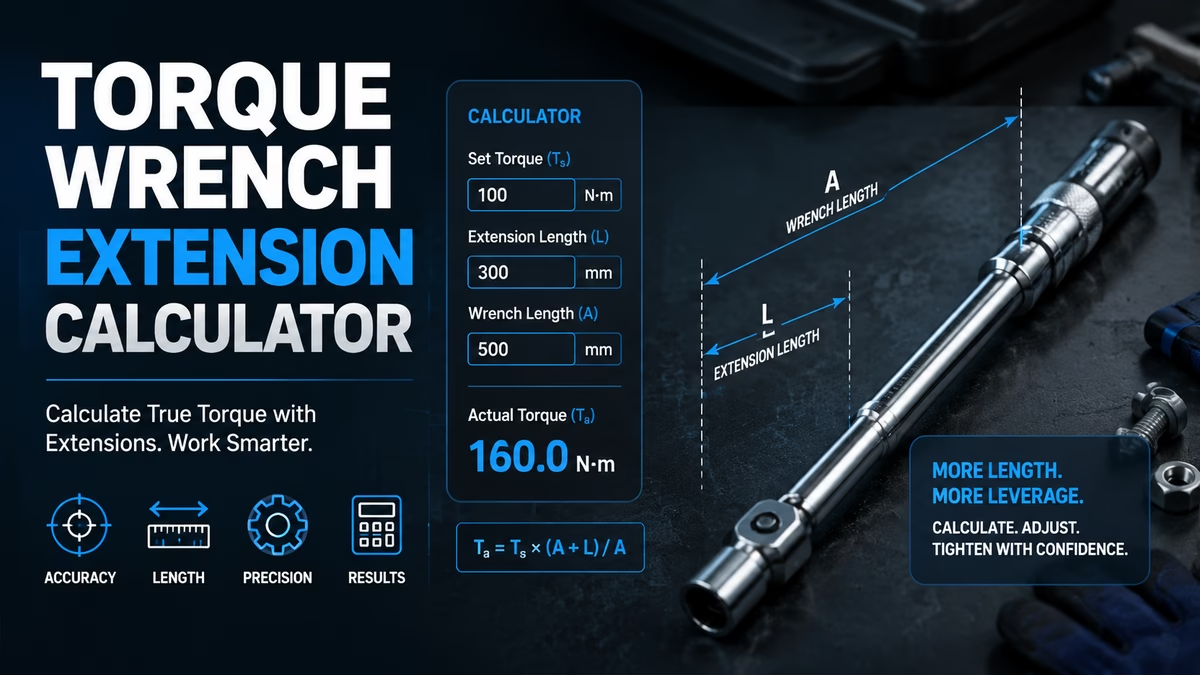
Torque Wrench Extension Calculator
Find the wrench setting needed when using a crowfoot, adapter, or extension bar.
Inputs
Result
| Effective extension (E × cos θ) | 60.0 mm |
| Correction factor L / (L + E·cosθ) | 0.882 |
| Total lever arm | 510.0 mm |
| Change vs. no extension | −11.8% |
How the math works & when to use it
Formula: T_setting = T_target × L / (L + E × cos θ)
Adding a crowfoot or adapter in line with the handle lengthens your lever arm, so the fastener receives more torque than the wrench reads. You compensate by setting the wrench lower. Reverse the formula to find the actual torque delivered by a given setting.
- Mount the crowfoot at 90° to the handle and there is no correction at all — the simplest way to avoid the math entirely.
- A plain straight socket extension bar does not change the lever arm — enter E = 0.
- Applies to click, beam and dial wrenches where the reading is taken at the grip. Always measure L to the point you actually hold.
- Some digital/electronic wrenches auto-compensate — check your manual first.
Disclaimer: for reference only. Always follow the manufacturer’s torque specification and procedure for safety-critical fasteners.
You grab a crowfoot to reach a tight fitting. Now your torque reading is wrong.
The Torque Wrench Extension Calculator above sorts that out in a second. But it pays to know why the number shifts in the first place. Here is the short version. Also read: How to Calibrate (and Test) a Click-Type Torque Wrench at Home
Why an extension changes your torque
Torque is force times length. Your wrench is set up for its own length, and nothing more. Add a crowfoot out front and the arm gets longer.
A longer arm means more twist at the bolt. The wrench still clicks at the same spot on the dial. But the nut now sees more than you asked for.
So you set the wrench lower to make up for it. That way the bolt gets the exact number from the shop manual.
The formula behind the tool
Here is the math the tool runs for you:
Setting = Target × L ÷ (L + E × cos θ)
Three things go in:
- L is your wrench length. Measure from the square drive to the middle of your grip.
- E is the extension length. Measure from the drive to the center of the bolt.
- θ is the angle between the crowfoot and the handle.
That is the whole thing. No other input changes the result.
How to measure L the right way
Most folks get L wrong on the first try. They reach for the full length of the wrench.
Do not do that. Measure to the spot where your hand rests. That is the point the wrench was built around, and it is what the maker used when they set the scale.
On a long bar the gap can be two inches. Two inches can shift your result by four percent. Worth the extra minute.
You might like to read: Beam vs Click vs Digital Torque Wrench: Which One Should You Use?
A worked example
Say the manual calls for 100 Nm. Your wrench is 450 mm long, and the crowfoot adds 60 mm out front.
Point the crowfoot straight ahead. The tool gives you 88.2 Nm.
Dial the wrench to 88.2 and pull. The bolt gets a true 100 Nm. Clean and simple.
The 90 degree trick
Here is the part most people miss. Turn the crowfoot sideways to the handle and you need no math at all.
Why? The extension no longer adds to the arm. It just sits off to one side. Set the wrench to the spec and go.
Try it in the Torque Wrench Extension Calculator. Drag the angle to 90 and watch what happens. The result lands right back on your target.
Keep this in your back pocket for tight jobs. It is the fastest safe route.
Do straight extension bars change torque?
No, they do not. A plain socket extension adds no torque error at all.
Think about the shape for a moment. The bar runs down the socket axis, not out from the handle. Your arm length never changes.
So enter zero for E. Length, brand, and drive size make no odds here.
One catch is worth a mention. A very long bar can flex and twist under load. That does not skew the reading, but it can make a click hard to feel.
When the crowfoot points back
You can also flip the crowfoot around so it faces the handle. Now the reach works against you.
This makes the arm shorter. The bolt gets less than the dial says, so you need to set the wrench higher.
Slide the angle to 180 in the tool and watch the number climb. Same math, other way round.
Common slips to dodge
A few things trip people up again and again:
- Using the full wrench length instead of the grip point
- Holding the wrench past the grip mark
- Forgetting the crowfoot shifted while you worked
- Mixing units, like Nm on the dial and lb-ft in the manual
That last one bites hard. A 100 lb-ft bolt set to 100 Nm sits way under spec.
A note on digital wrenches
Some smart wrenches adjust for you. You type in the extension length and they handle the rest.
Check your manual first. If yours does the job, skip the tool here. Doing both would double up the fix and leave the bolt loose.
Most click wrenches have no such feature. For those, the tool above is your friend.
Quick answers
Does the extension weight matter?
No. Only length and angle count.
What if my angle is 45 degrees?
Use the slider. The tool handles any angle from 0 to 180.
Can I work in inches?
Yes. Switch the unit dropdown next to each box.
Is this good for wheel nuts?
Yes, but check the spec first. Wheel work leaves no room for guesswork.
Why is my answer lower than the target?
That is normal with a forward crowfoot. The longer arm does the extra work for you.
Before you turn that bolt
Measure L to your grip. Enter the true crowfoot reach. Set the angle you plan to use, then read off the number.
Trust it and pull smooth. No jerks, no bounce on the handle.
One last word. For brakes, wheels, and engine work, follow the maker’s book. This tool guides you, but the shop manual rules.