
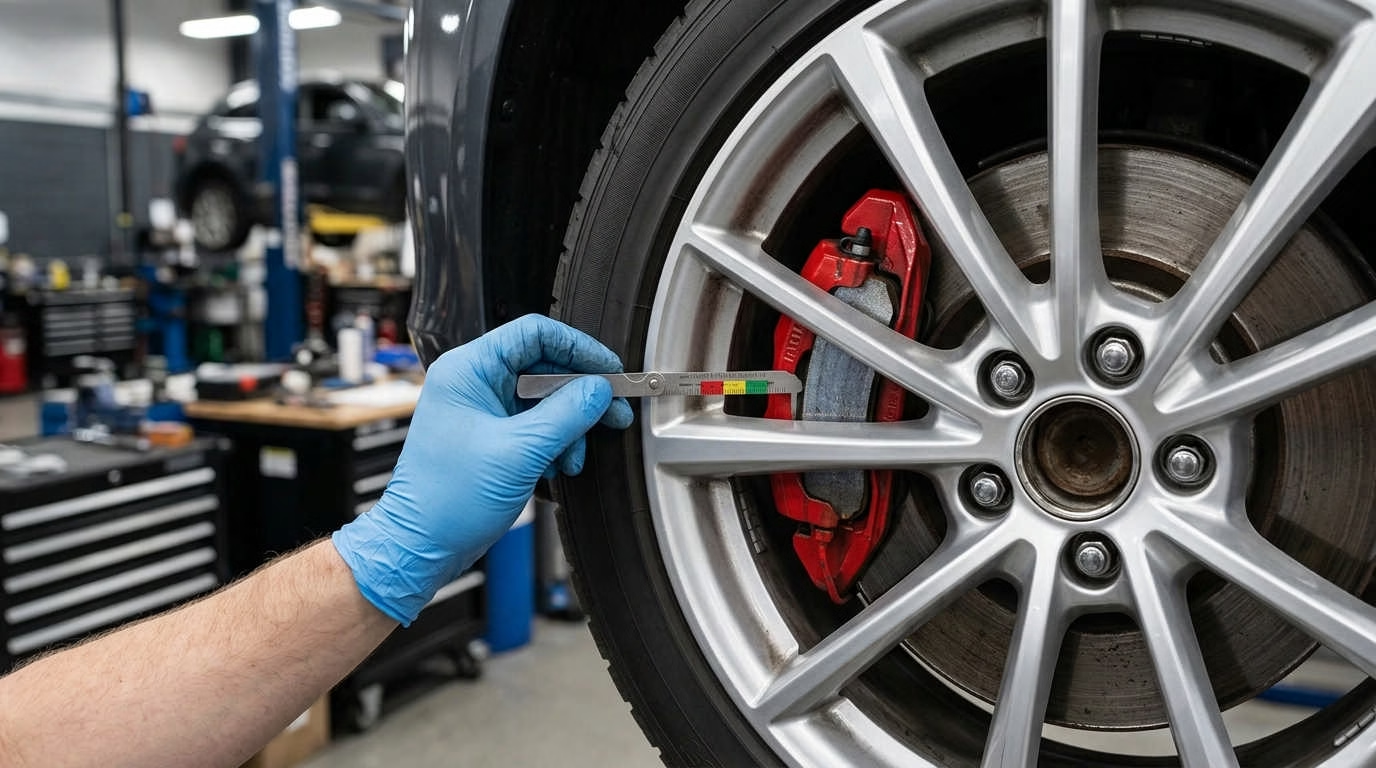
How these tools were selected: I reviewed a large mix of customer feedback, mechanic discussions, buyer comments, and product details before setting the rankings. The list focuses on what owners and technicians report after real use, rather than claims printed on the box.
The best brake pad measuring tool for most people is the OTC 6596. It provides a clear millimeter reading and fits through many wheel openings. If you prefer a simpler tool, the Lisle 81850 is easier to use and has no moving parts.
Both choices help you measure the remaining friction material. That is the part of the pad that presses against the brake rotor.
A good gauge can help you:
- Spot worn pads before they damage the rotor
- Track pad wear over time
- Check a used car before purchase
- Confirm whether both pads wear evenly
- Plan repairs before the pads reach their limit
Still, no wheel-on gauge works on every car. Wheel shape, caliper size, and tight gaps can block access. When that happens, remove the wheel and inspect both pads.
Best Brake Pad Measuring Tools at a Glance
Prices change often, so the ranges below are only a guide. Tool access also depends on your wheel and brake design.
Top Brake Pad Thickness Gauges
Side-by-side comparison of the best brake pad measurement tools
| Rank | Product | Best for | Tool type | Measurement range | Units | Wheel removal |
|---|---|---|---|---|---|---|
| 1 | Best overall | Sliding probe | Color scale with mm readings | Metric |
Not needed on many cars | |
| 2 | Most DIY owners | Stepped blades | 2 to 12 mm | Metric & Decimal inches |
Varies by vehicle | |
| 3 | Shop inspections | Sliding probe | Full range not clearly published | Metric |
Not needed on many cars | |
| 4 | Heavy shop use | Steel blades | 2 to 12 mm | Metric & SAE |
Varies by vehicle | |
| 5 | Fine readings on a budget | Sliding probe | 1.5 to 11 mm | Metric |
Not needed on some cars | |
| 6 | UK and European users | Sliding probe | 1.5 to 13 mm | Metric |
Not needed on some cars |
The Best Brake Pad Measuring Tools Reviewed
The six tools below serve different needs. Some give a set thickness. Others provide a reading along a scale.
Each review separates three types of information:
- Verified specifications: Published product details
- User-reported experience: Comments from owners and technicians
- Research-based assessment: How the tool compares with the other picks
1. OTC 6596 Brake Pad Gauge: Best Overall

The OTC 6596 is a sliding brake pad measurement tool. You place its contact points around the pad and rotor. The scale then shows the remaining pad material.
Its narrow body can reach through many wheel spokes. This may let you inspect a pad without lifting the car or removing the wheel.
That makes the OTC useful for quick checks. It also helps technicians inspect several cars each day.
Key specifications
- Model: OTC 6596
- Tool type: Sliding probe gauge
- Reading: Millimeters
- Display: Numbered and color-coded scale
- Access: Wheel-on use on many vehicles
- Calibration: Adjustable
- Typical price: About $20 to $35
OTC states that the tool can be checked for calibration. In its resting position, the barrel should show 4 mm. You can adjust the screws if the reading moves out of place.
That is a useful feature. It also means you should check the gauge before trusting a close reading.
What we like
- Gives a more detailed reading than stepped blades
- Reaches pads that may be hard to see
- Provides fast results during routine inspections
- Uses a clear color scale
- Can be checked and recalibrated
- Works well for repeat measurements
The scale makes it easy to record wear. For example, you can note that a pad dropped from 7 mm to 5 mm between services.
A blade set cannot show that change as clearly. It may only tell you that the pad sits somewhere between two fixed sizes.
What could be better
- Correct placement takes some practice
- Moving parts may shift over time
- Tight wheel spokes can block access
- The color zones are only a basic guide
- Dirt can make the scale harder to read
- It cannot expose cracks or damaged pad surfaces
You must place the tool against the right points. If the probe rests on the backing plate or rotor lip, the result may be wrong.
Take two or three readings. If they differ, remove the wheel and inspect the pad directly.
What users and technicians report
Professional feedback often focuses on speed. Technicians like being able to reach pads that are hard to see through the wheel.
Users also like the millimeter scale. It is easier to record than a visual guess such as “about half worn.”
One concern involves the color zones. Different shops may not agree on the exact point for replacement. A red area on the gauge does not replace the service limit set for your car.
Best suited for
- Professional technicians
- Used-car inspections
- Routine home maintenance
- Multipoint vehicle inspections
- Anyone tracking pad wear by millimeter
Bottom line
The OTC 6596 earns the top spot because it balances access and detail. It is fast enough for shop use but simple enough for a careful DIY owner.
Choose it when you want a clear number. Just check its calibration and repeat close readings.
2. Lisle 81850 Combination Brake Lining Thickness Gauge Set: Best for Most DIY Owners

The Lisle 81850 takes a simpler approach. It includes separate blades with fixed thicknesses.
You slide a blade beside the pad material. If it fits, try the next size. This lets you place the pad within a clear thickness range.
There are no springs, screws, or scales to adjust. That makes the set easy to understand.
Key specifications
The nine-piece set includes:
- 2 mm right-angle gauge
- 2 mm straight gauge
- 3 mm gauge
- 4 mm gauge
- 5 mm gauge
- 6 mm gauge
- 8 mm gauge
- 10 mm gauge
- 12 mm gauge
Other details include:
- Material: Flexible acetal [tough plastic]
- Units: Metric and decimal inches
- Colors: Red, yellow, and green
- Access: Straight and angled tips
- Typical price: About $20 to $30
The right-angle 2 mm gauge is the feature that stands out. It can reach spots where a straight blade has no clean path.
What we like
- Very easy to use
- No calibration needed
- No moving parts
- Angled tip helps in tight spaces
- Flexible blades are gentle near painted parts
- Clear color coding speeds up checks
- Individual gauges can be replaced
This set also handles dirt and storage well. There is no sliding barrel that needs to move freely.
The flexible material can help around crowded calipers. It also reduces the chance of scratching a painted wheel.
What could be better
- It cannot show an exact reading between sizes
- Flexible blades may feel less solid than steel
- Some wheels still block access
- The set has several loose pieces
- A lost blade creates a gap in the range
Suppose the 5 mm blade fits but the 6 mm blade does not. You only know the pad sits between those points. You do not know whether it measures 5.2 or 5.8 mm.
That level of detail is not needed for most home checks. Still, it matters if you track wear for shop records.
What real users report
Owners often raise questions about the plastic build. Yet reported experience has been positive in normal shop use.
Users say the gauges remain easy to read after exposure to oil and grime. Reports of broken blades or damaged colors appear uncommon in the feedback reviewed.
The simple design also reduces user error. You still need to identify the friction material, but there is no scale to misread.
Best suited for
- Home mechanics
- First-time gauge users
- Quick maintenance checks
- Toolboxes exposed to dirt and fluids
- Owners who prefer simple tools
Bottom line
The Lisle 81850 is the best choice for many DIY owners. It is easy to use, hard to misread, and needs no setup.
It gives a thickness range rather than a fine reading. For basic maintenance, that trade-off often makes sense.
3. Tool Aid 65300 In-Line Brake Pad Gauge: Best for Professional Courtesy Inspections
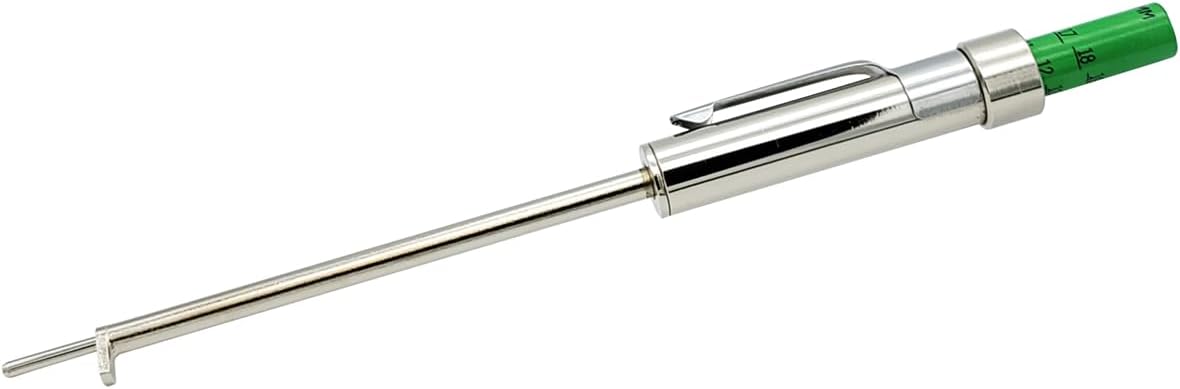
The Tool Aid 65300 uses a straight sliding probe. It measures the distance between the rotor and pad reference point.
Its main strength is speed. A technician can check many brakes without setting up a larger tool.
The design can also hold the reading after you pull it away. That helps when you cannot see the scale inside the wheel.
Key specifications
- Model: Tool Aid 65300
- Tool type: In-line sliding gauge
- Units: Metric
- Display: Color-coded scale
- Pad access: Inner and outer pads where space permits
- Backing-plate reference: 6 mm
- Typical price: About $17 to $25
A full minimum-to-maximum range was not clearly available from the manufacturer material reviewed. That is worth noting if you need a set range for shop records.
What we like
- Quick to use during routine checks
- Compact enough for a work cart
- Can hold a reading after removal
- Color zones show well in inspection photos
- May reach both inner and outer pads
- Strong fit for high-volume shop work
The retained reading is useful. You can take the measurement, remove the gauge, and read it under better light.
This is also helpful for digital inspections. A clear photo of the gauge gives the customer more context than a blurry brake pad image.
What could be better
- Calibrated around a 6 mm backing plate
- Full measurement range is not clearly stated
- Requires correct contact points
- Not compatible with every pad design
- Wheel access varies
- The color zones are not car-specific
The backing plate is the steel base behind the friction material. Pad makers do not use one thickness for every design.
If your pad has a different backing plate, the tool may show an offset reading. That can make the pad seem thicker or thinner than it is.
What professional users report
Shop feedback is strong for this model. Technicians report that it works well for courtesy checks and routine service visits.
Users also like its simple learning curve. In one shop comparison, technicians began choosing it over similar tools after a short trial.
The color scale is another common benefit. It creates a clear visual for inspection reports.
Best suited for
- Repair shops
- Mobile technicians
- Digital vehicle inspections
- Courtesy brake checks
- Cars with standard 6 mm backing plates
Bottom line
The Tool Aid 65300 fits a busy shop better than most basic gauges. It saves time and gives a reading you can document.
Its main limit is the 6 mm backing-plate reference. Confirm pad compatibility before relying on a close result.
4. Steelman 97844 8-Piece Brake Lining Thickness Gauge: Best Heavy-Duty Metal Set

The Steelman 97844 uses eight fixed steel blades. Each blade represents one common brake lining thickness.
It works much like the Lisle set. The main difference is its rigid metal build.
That makes the Steelman a better fit for a crowded shop toolbox.
Key specifications
The set includes these sizes:
- 2 mm
- 3 mm
- 4 mm
- 5 mm
- 6 mm
- 8 mm
- 10 mm
- 12 mm
Other details include:
- Material: 20-gauge steel
- Finish: Colored powder coating
- Markings: Stamped metric and SAE sizes
- Applications: Disc pads and drum linings
- Warranty: One-year limited warranty
- Typical price: About $13 to $25
The sizes are stamped into the steel. You can still identify each gauge if the colored finish starts to wear.
What we like
- Rigid steel construction
- Stamped markings resist wear
- No calibration required
- Works for disc and drum linings
- Long, narrow blade tips
- Low price for a known tool brand
- Easy to clean after use
Fixed steel blades are useful in a busy shop. They will not flex as much when pushed into a tight gap.
The rigid tip can also make the fit easier to judge. You feel when the blade reaches the available space.
What could be better
- Straight blades can struggle in angled gaps
- Steel may mark a painted wheel or caliper
- It gives fixed steps, not an exact reading
- It is an indicator, not a fine measuring tool
- Detailed long-term user reports are limited
Use care around coated brake parts. A sharp steel edge can leave a mark if you push it against a painted surface.
You should also avoid forcing a blade into the gap. The goal is to compare thickness, not wedge the parts apart.
Best suited for
- Professional toolboxes
- Fleet maintenance
- Heavy vehicle service
- Disc and drum brake work
- Users who prefer rigid gauges
Bottom line
The Steelman 97844 is a strong low-cost metal set. It favors long service life over fine readings.
Choose it if you want a simple gauge that can handle rough storage. Pick the Lisle instead if angled access matters more.
5. FIRSTINFO F3917 Brake Pad Thickness Gauge: Best Value Continuous-Scale Gauge

The FIRSTINFO F3917 is another sliding probe gauge. It offers a marked scale rather than fixed blade sizes.
Its slim shape can reach behind many wheel spokes. The scale covers both heavily worn and thicker pads.
It costs less than some professional probe tools. However, it has less field history.
Key specifications
- Model: FIRSTINFO F3917
- Tool type: Sliding probe
- Range: 1.5 to 11 mm
- Units: Metric
- Backing-plate reference: 6 mm
- Material: Stainless-steel parts and anodized body
- Use: Inner and outer pads where accessible
- Typical price: About $19 to $25
The tool includes a calibration check mark. Check that mark before you take an important reading.
What we like
- Continuous scale
- Useful 1.5 to 11 mm range
- Slim body for tight gaps
- Low weight
- Reasonable price
- Better product support than many generic gauges
You can record smaller changes with this tool. That helps if you inspect the same car several times per year.
Its metal parts should also hold up better than a very cheap plastic copy.
What could be better
- Limited long-term shop use data
- Correct use takes practice
- Dark wheel openings hide the scale
- The 6 mm backing-plate limit matters
- Small movements can affect the reading
A bright inspection light helps. You can also take the reading, remove the tool, and view the scale in better light if it holds its position.
Do not assume the tool is accurate for every pad. Confirm the backing plate before using it for a repair decision.
What real users report
Early owner feedback describes the gauge as handy and quick. Users also warn that correct placement matters.
That is fair for this tool style. Sliding probes can provide useful readings, but only when you use the right reference points.
The review sample remains small. That makes long-term wear and scale life harder to judge.
Best suited for
- Occasional DIY inspections
- Owners who want a detailed scale
- Cars with compatible backing plates
- Users who can verify close readings
- Small home garages
Bottom line
The FIRSTINFO F3917 offers good range for its price. It is a sensible option if you want more detail than blade gauges provide.
It sits below the OTC and Tool Aid due to limited field history. The pad design limit also deserves close attention.
6. Sealey VS058 Brake Pad Thickness Gauge: Best UK and European Option
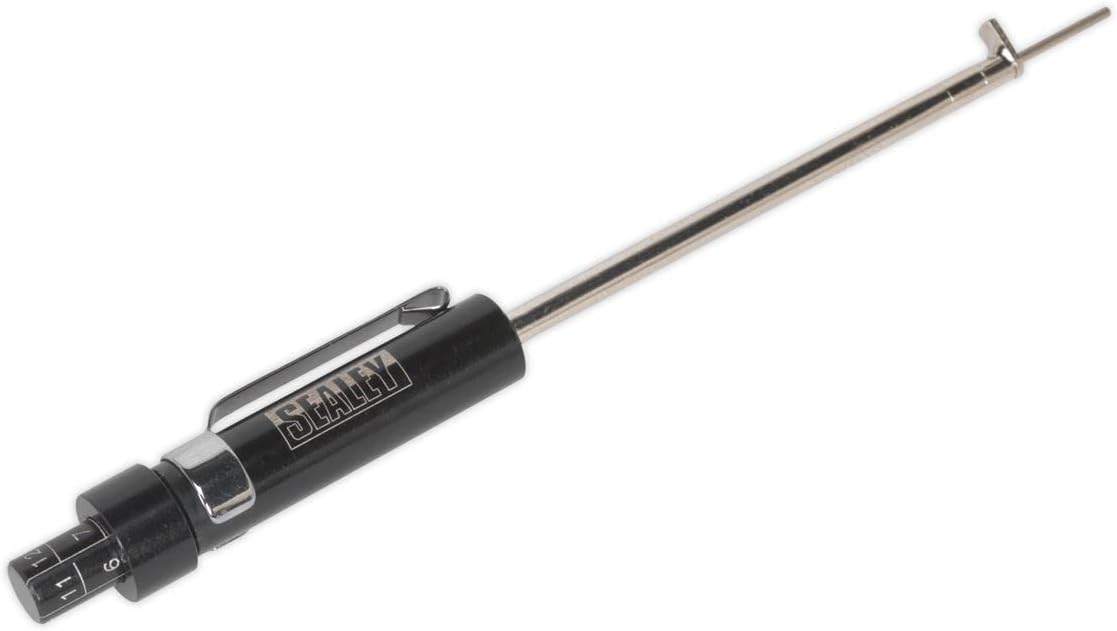
The Sealey VS058 is a slim probe gauge with a metric scale. It is aimed at quick brake checks without wheel removal.
Its range reaches 13 mm. That is wider than the other continuous-scale models here.
Sealey also gives clear instructions for setup and use.
Key specifications
- Model: Sealey VS058
- Tool type: Sliding probe
- Range: 1.5 to 13 mm
- Units: Metric
- Backing-plate reference: 6 mm
- Minimum mark: 1.5 mm
- Warranty: One year
- Typical price: About £19 to £27
The manufacturer describes the 1.5 mm point as a pre-inspection mark. You should still use the service limit for your vehicle.
What we like
- Wide 1.5 to 13 mm range
- Clear metric scale
- Compact design
- Useful calibration line
- Good UK availability
- Suitable for inner and outer pads when accessible
The wide scale helps with thicker pads. It also covers the lower end where a replacement decision becomes more urgent.
The printed instructions reduce guesswork. That is important for any gauge using a backing-plate reference.
What could be better
- Few detailed user reports
- Less practical for North American buyers
- Relies on a 6 mm backing plate
- Tight calipers may block the probe
- The minimum mark is not a universal limit
The published details are clear, but there is less owner feedback for this model. That lowers confidence in its long-term shop life.
It may still be a good local choice. Just confirm that your pads match its reference design.
Best suited for
- UK workshops
- European home mechanics
- Mobile inspection kits
- Users who need readings up to 13 mm
- Cars with a 6 mm pad backing plate
Bottom line
The Sealey VS058 has a useful range and clear instructions. It makes the most sense where Sealey tools are easy to find.
Its lower rank reflects limited user evidence. It does not suggest a clear fault with the tool.
How We Chose the Best Brake Pad Measuring Tools
A useful ranking needs more than star counts. Many product listings combine seller ratings, shipping comments, and tool feedback.
I placed more weight on reports that explained how the gauge worked. I also checked whether each tool was made for brake pad or lining measurements.
Product-purpose verification
Every tool on this list is designed to check brake friction material.
I excluded:
- Tire tread depth gauges
- Rotor micrometers
- Brake piston tools
- Pad spreaders
- General gap gauges with no brake use
- Unnamed tools with unclear scales
A tire tread gauge may look similar to a brake probe. It does not use the same contact points.
Specification verification
The main specifications checked included:
- Model number
- Measurement range
- Metric or SAE units
- Material
- Included blade sizes
- Backing-plate reference
- Wheel-on use claims
- Warranty details
If a full range was not available, I have said so. A missing specification should not be filled with a guess.
Real-world evidence
Useful owner feedback explains the task and result. For example, it may say the tool reached an inner pad or held its reading.
I gave more weight to:
- Working mechanics
- Shop managers
- Fleet technicians
- Experienced home mechanics
- Buyers who described repeated use
A five-star score without a comment tells you little. It may only show that the package arrived on time.
Accessibility and ease of use
A brake pad gauge must fit into a tight area. A fine scale is useless if the probe cannot reach the pad.
I considered:
- Wheel-spoke width
- Caliper size
- Inner-pad access
- Straight or angled tips
- Scale visibility
- Reading retention
- Ease of cleaning
No tool wins every access test. A right-angle blade may fit where a straight probe cannot.
Accuracy and repeatability
Repeatability means getting a similar result each time. That matters more than a tool claiming fine marks on its scale.
A good gauge should:
- Sit square against the parts
- Return similar readings
- Resist unwanted movement
- Have clear marks
- Allow a calibration check when needed
A close reading should always be repeated.
Value
The cheapest gauge is not always the best value. A tool that saves time may be worth more in a shop.
I considered:
- Purchase price
- Build quality
- Ease of use
- Range
- Warranty
- Replacement parts
- Time saved
- Risk of user error
Brake Pad Measuring Tool Buying Guide
The best brake pad measuring tool depends on your work. A shop may value speed and records. A home user may prefer a simple blade set.
Start by choosing the right tool style. Then check its range and pad compatibility.
Stepped gauges versus probe-style gauges
These two designs measure brake pads in different ways.
Stepped gauges
A stepped set uses blades with set thicknesses. You compare each blade with the remaining pad material.
Benefits:
- Simple to understand
- No moving parts
- No battery
- Little setup
- Fast go or no-go checks
- Low risk of scale errors
Limits:
- Only measures fixed sizes
- Cannot show small changes
- May not fit angled gaps
- Several loose blades can be lost
A stepped gauge works well for routine home checks. It tells you whether a pad sits near 3, 5, or 8 mm.
Probe-style gauges
A probe gauge uses a sliding rod and marked scale. It can often show a more exact result.
Benefits:
- More detailed readings
- Easier wear records
- Good through-wheel access
- Useful for shop reports
- May retain the reading
Limits:
- More sensitive to placement
- May need calibration
- Can depend on backing-plate thickness
- Dirt may affect movement
- Has more parts that can wear
Choose a probe if you need a number. Choose blades if you value speed and simplicity.
Plastic, aluminum, or steel construction
Each material has a place.
- Plastic or acetal: Light, flexible, and less likely to scratch
- Aluminum: Light and firm, but quality can vary
- Steel: Strong and stable, but may mark paint
Steel makes sense in a busy toolbox. Flexible plastic works well near painted wheels.
Material alone does not decide accuracy. The tool shape and correct use matter more.
Measurement range
A useful gauge should cover worn pads and common new-pad sizes.
Key points include:
- 1.5 to 3 mm: Very low pad material
- 4 to 6 mm: Middle wear range
- 8 to 12 mm: Thick or newer pads
These are broad reference points. They are not service rules for every vehicle.
A wide range is helpful, but it does not prove accuracy. Clear marks and repeat results matter more.
Metric versus SAE measurements
Brake pad thickness is often stated in millimeters. Small changes are easy to describe this way.
Some blade sets also show decimal inches. That may help in a mixed workshop.
For most owners, metric readings are simpler. A record of 8 mm, 6 mm, and 4 mm is easy to track.
Color-coded wear zones
Most brake gauges use three colors:
- Green: More material remains
- Yellow: Plan another check or service
- Red: Low material needs prompt attention
These colors are visual guides. They are not universal service limits.
Your car maker may set a different minimum. Local inspection rules may also differ.
Wheel-on measurement capability
A wheel-on gauge can save time. You may check the pads through a gap between the spokes.
This is useful for:
- Routine service
- Used-car checks
- Quick home inspections
- Shop courtesy checks
- Tracking wear over time
However, access varies. You may face:
- Narrow wheel gaps
- Large brake calipers
- Deep wheels
- Dust shields
- Poor light
- Hidden inner pads
Turn the steering wheel to improve front brake access. Do this only while the car is parked and secure.
If you remove the wheel, reinstall it with care. Follow the right tightening pattern and use a torque wrench. This guide explains how to torque lug nuts correctly.
Backing-plate calibration
This is one of the most missed details.
The backing plate is the steel base behind the pad material. Some probe gauges use it as a reference point.
A tool built around a 6 mm plate may be wrong on another size. The error can affect your final pad reading.
Before using an indirect gauge:
- Read the tool instructions.
- Check the stated backing-plate size.
- Confirm the pad design if possible.
- Repeat the reading.
- Remove the wheel if the result is close.
Do not treat the scale as exact when compatibility is unknown.
Readability and lighting
Brake areas are dark and dirty. Small marks can disappear behind a wheel.
Look for:
- Large scale markings
- High color contrast
- Stamped or engraved sizes
- A scale that holds its position
- Clear millimeter marks
Keep a small inspection light nearby. Clean dirt from the tool before reading it.
Tool storage and replacement parts
Keep stepped blades attached to their holder. A missing 3 mm or 4 mm gauge leaves a key gap.
Store sliding gauges where heavy tools cannot crush them. Dirt and metal chips may also jam the probe.
After use:
- Wipe off brake dust
- Check that the probe moves freely
- Inspect blade edges
- Confirm the scale returns correctly
- Replace damaged or bent parts
Do not blow brake dust with compressed air. That can spread fine particles.
How to Measure Brake Pad Thickness Correctly
Correct tool placement matters more than price. Even a good gauge can give a poor result if it touches the wrong surface.
Work on cool brakes. Park on level ground and keep the car secure.
What part of the brake pad should be measured?
A disc brake pad has several layers:
- Friction material: The part you measure
- Backing plate: The steel base
- Shim: A thin noise-control layer
- Rotor: The metal disc that turns with the wheel
Measure only the friction material between the rotor and backing plate.
Do not add the steel plate or shim. That can make a worn pad appear healthy.
How to use a stepped brake pad gauge
Follow these steps:
- Park on firm, level ground.
- Set the parking brake where safe.
- Let the brakes cool.
- Find the pad’s friction material.
- Insert a blade beside the material.
- Try the next larger size.
- Find the largest blade that fits.
- Record the closest thickness range.
- Repeat on the inner pad.
- Check the other side of the car.
Do not force the blade. A light fit is enough.
If 5 mm fits and 6 mm does not, record the pad as between 5 and 6 mm.
How to use a probe-style brake pad gauge
The exact steps vary by model. Read the tool instructions first.
A common method is:
- Check the tool’s calibration.
- Confirm the backing-plate requirement.
- Place the gauge against the correct reference.
- Extend the probe toward the rotor.
- Keep the body straight.
- Hold or lock the reading.
- Remove the tool.
- Read the millimeter scale.
- Repeat the test.
- Compare inner and outer pads.
Two close readings build confidence. A large difference suggests poor placement or uneven wear.
How to measure brake pads without removing the wheel
Open alloy wheels often provide enough access. Steel wheels and tight spoke designs may not.
For a wheel-on check:
- Use a bright inspection light
- Turn the front wheels for a better angle
- Find the pad and backing plate
- Keep clear of the rotor’s outer lip
- Check whether the inner pad is reachable
- Repeat the reading from another angle
Do not place your hands near hot parts. Never inspect a car while the wheel is moving.
Remove the wheel if you cannot confirm the contact points. A fast reading is not useful if you cannot trust it.
What Is a Safe Brake Pad Thickness?
There is no single safe number for every car. Pad design, vehicle weight, and service rules all affect the limit.
You should use the repair information for your exact vehicle. Local inspection rules may also set a minimum.
Understanding new, worn, and critical pad thickness
New pads often have much more material than worn pads. Many passenger car pads start within the upper range covered by these gauges.
As a broad guide:
- Thick pads need normal checks
- Mid-range pads need wear tracking
- Low pads need prompt attention
- Pads near their limit need direct inspection
Do not wait for metal contact. A worn pad can damage the rotor and reduce brake control.
Why color-coded gauges are only a guide
Gauge colors make inspections faster. Yet they cannot account for:
- Your car’s service limit
- Planned travel distance
- Towing
- Steep road use
- Uneven wear
- Local inspection rules
- Pad cracks or damage
A yellow reading may be fine for one driver. It may need action sooner for a car facing a long trip.
When to replace brake pads
Thickness is only one factor.
Replace or inspect pads further if you find:
- Cracked friction material
- Oil or grease on the pad
- Uneven inner and outer wear
- Tapered wear
- Material separating from the plate
- Grinding sounds
- Pulling while braking
- Deep rotor damage
- Stuck caliper parts
A thick pad can still be unsafe if it is cracked or soaked with fluid.
Common Brake Pad Measurement Mistakes
Most poor readings come from placement errors. The tool is often not the main problem.
Watch for the mistakes below.
Measuring the backing plate with the friction material
This gives an inflated reading. A pad may appear several millimeters thicker than its usable material.
Find the clear line between the steel plate and the pad material. Measure from that line to the rotor.
Measuring only the easy-to-see outer pad
The inner pad can wear faster. Sticking slide pins or a caliper issue may cause the difference.
Always check both pads where possible. If you cannot reach the inner pad, remove the wheel.
Resting the probe on the rotor wear lip
A worn rotor may have a raised edge. That edge can shift the gauge.
Place the probe on the flat rotor face. Avoid the raised outer rim.
Holding the gauge at an angle
An angled probe may show more distance than the true gap.
Keep the tool square. Take another reading if the angle feels poor.
Trusting the color instead of the number
Color zones are quick guides. Record the number whenever the gauge provides one.
Then compare it with the correct limit for your car.
Assuming both sides wear equally
The left and right brakes may not wear at the same rate.
Check:
- Left and right wheels
- Inner and outer pads
- Top and bottom areas
- Any spot that looks tapered
A large difference can point to a stuck part.
Using a 6 mm-calibrated tool on an incompatible backing plate
This creates an offset in the reading. The tool may appear to work while showing the wrong result.
Check the pad design. Confirm doubtful readings with the wheel removed.
Measuring only once
One reading may be affected by dirt or poor placement.
Take at least two readings. If they differ, clean the contact area and try again.
Brake Pad Gauge Versus Other Measuring Tools
Several tools can measure brake parts. They are not interchangeable.
Choose the tool based on access and the part being checked.
Brake pad gauge versus digital caliper
A digital caliper provides a precise reading on an exposed or removed pad.
It may not fit around an installed pad. Caliper jaws can also struggle inside a crowded brake assembly.
A brake pad gauge offers better access. A digital caliper offers finer detail when the pad is removed.
Brake pad gauge versus micrometer
A micrometer measures small thickness changes with high detail. It works best when the part is easy to reach.
Brake pad gauges focus on fast checks. Rotor micrometers are shaped for brake discs, not hidden pad material.
Use the right tool for the part. Do not treat a rotor tool as a pad gauge.
Brake pad gauge versus visual inspection
A visual check helps you find major wear. It is less useful near a service limit.
Your viewing angle can make the pad seem thicker. Dirt and wheel spokes can hide the true edge.
A gauge gives you a repeatable reference. Visual inspection still helps you spot cracks and odd wear.
Brake pad gauge versus tire tread gauge
A tire tread gauge is made for grooves in tire rubber. It does not reference the brake rotor and backing plate correctly.
Do not use one as a brake pad gauge. A similar shape does not mean it measures the same way.
Do You Need a Brake Pad Measuring Tool?
You do not need one for every brake task. Yet it can make routine checks far clearer.
The best choice depends on how often you inspect brakes.
For DIY owners
A basic blade set can help you:
- Track wear between services
- Check a used car
- Plan pad replacement
- Compare inner and outer pads
- Question a doubtful estimate
You do not need a costly gauge for occasional use. A simple stepped set may be easier.
For professional mechanics
A probe gauge can speed up regular inspections. It also creates a number you can place in a service record.
Useful shop benefits include:
- Faster checks
- Clear inspection photos
- Repeatable notes
- Better customer explanations
- Less wheel removal on suitable cars
A gauge should support a full inspection. It should not replace one when the car has brake symptoms.
For occasional users
If you inspect one or two cars, choose a stepped set. It will sit in storage without losing calibration.
A sliding gauge makes more sense if you want exact records. It also helps when wheel-on access saves real time.
Our Final Verdict
The best brake pad measuring tool should fit your workflow, not just your budget.
Here is where each pick stands:
- Best overall: OTC 6596
- Best for most DIY owners: Lisle 81850
- Best for professional courtesy inspections: Tool Aid 65300
- Best heavy-duty metal set: Steelman 97844
- Best value continuous-scale gauge: FIRSTINFO F3917
- Best UK or European option: Sealey VS058
The OTC 6596 gives you the best mix of access and detail. The Lisle 81850 is the easier choice if you want no moving parts.
For shop use, the Tool Aid 65300 fits fast inspection work. The Steelman set makes sense where tools face rough storage.
Whichever tool you use, check both pads. Repeat close readings and remove the wheel when access is poor.
Frequently Asked Questions
What is the best brake pad measuring tool?
The OTC 6596 is the best overall option in this group. It provides millimeter readings and works through many wheel openings.
The Lisle 81850 may suit you better if you want simple fixed blades. It needs no calibration and has no moving parts.
What tool is used to measure brake pad thickness?
You can use:
- A stepped brake lining gauge
- A sliding brake pad probe
- A digital caliper on an exposed pad
- A micrometer on a removed and accessible part
Stepped and probe gauges are the easiest options for installed pads.
Can you measure brake pads without removing the wheel?
Yes, you can on many vehicles. Open wheel spokes may provide enough space.
Large calipers or narrow gaps may block the gauge. Remove the wheel if you cannot see the contact points.
How accurate are brake pad thickness gauges?
Accuracy depends on the gauge, placement, and pad design.
A stepped blade gives a clear thickness range. A probe can give more detail but may depend on calibration and backing-plate size.
Is a plastic brake pad gauge accurate?
Yes, it can be. The blade thickness and correct placement matter more than the material.
Plastic gauges may flex more than steel. That can help or hurt, based on access.
Are metal brake pad gauges better than plastic ones?
Not in every case.
Metal is rigid and durable. Plastic is flexible and less likely to scratch painted parts.
Choose metal for hard shop use. Choose plastic for simple checks around finished wheels.
Can I use a tire tread gauge to measure brake pads?
No. A tire tread gauge is made for tire grooves.
It does not use the correct brake reference points. Use a tool made for pad or lining thickness.
Can I use a digital caliper to measure brake pads?
Yes, if the pad is removed or fully accessible.
A caliper may be more precise than a stepped gauge. It is often harder to use with the brake assembled.
Do I measure the brake pad with the backing plate?
No. Measure only the friction material.
Do not include the steel backing plate or shim. Including them makes the pad look thicker.
Should I check the inner and outer brake pads?
Yes. The inner pad may wear faster due to a sticking caliper or slide pin.
Check both pads on both sides of the car.
What does red, yellow, and green mean on a brake pad gauge?
In general:
- Green means more pad remains
- Yellow means plan service or another check
- Red means the pad is near a low range
These are broad guides. Follow your vehicle’s service limit.
Why do some brake pad gauges assume a 6 mm backing plate?
The tool uses the backing plate as a measuring reference. Its scale subtracts the expected plate thickness.
A different plate size can change the result. Check compatibility before trusting the number.
How often should brake pad thickness be checked?
Check the pads during routine service or tire rotation. You should also inspect them before a long trip.
Check them sooner if you hear noise, feel pulling, or notice poor braking.
Can a brake pad gauge detect uneven wear?
Yes, but only if you measure several points.
Check the inner and outer pads. Compare both sides and inspect for a tapered shape.
The gauge finds the difference. It does not tell you what caused it.
Is 3 mm of brake pad thickness safe?
Many shops treat 3 mm as a point for prompt service planning. It is not a universal rule.
Your decision should account for:
- Vehicle service limits
- Pad condition
- Wear rate
- Upcoming mileage
- Towing or heavy use
- Local inspection rules
If the reading is close, remove the wheel and confirm it directly.